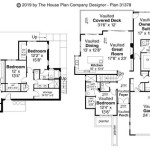
Simple House Floor Plan AutoCAD with Dimensions in Meters
Creating a floor plan in AutoCAD is a fundamental task for architects, designers, and anyone involved in building projects. A well-crafted floor plan provides a clear visual representation of a space, outlining the layout, dimensions, and relationships between different elements. This article will guide you through the process of generating a simple house floor plan using AutoCAD, with all dimensions expressed in meters.
1. Setting Up the Drawing Environment
Before starting the design, it is crucial to set up the AutoCAD drawing environment correctly. This ensures consistent units and facilitates accurate measurements throughout the plan.
1.1. Units:
Navigate to the "Options" menu, which is accessible through the dropdown under the "Tools" tab. In the Options window, locate the "Units" section. Select "Metric" as the unit system and "Decimal" as the unit format. This ensures that all measurements will be displayed in meters.
1.2. Drawing Limits:
To define the boundaries of your drawing, set the drawing limits. Access the "Limits" command from the "Drafting" tab or by typing "LIMITS" in the command line. Specify the lower left and upper right corners of your drawing area, ensuring they encompass the entire house footprint.
1.3. Layer Setup:
Establish a clear layer structure for organizing different elements in your floor plan. Create layers for walls, doors, windows, furniture, and other relevant features. This helps in managing the complexity of the plan and simplifies future modifications.
2. Drawing the House Perimeter
Once the drawing environment is set up, begin creating the house perimeter.
2.1. Using the "Line" Command:
Utilize the "Line" command, accessed from the "Draw" tab or by typing "LINE" in the command line. Click on your desired starting point on the drawing canvas. Subsequently, click on each subsequent point to define each side of the house perimeter. Remember to close the shape by clicking on the initial starting point.
2.2. Specifying Dimensions:
As you draw each line segment, the "Dynamic Input" feature in AutoCAD allows you to specify the length of each side. Simply type in the desired length in meters, and the line will automatically adjust to the specified dimension.
3. Adding Interior Walls and Rooms
With the house perimeter defined, proceed to create the interior walls and delineate the various rooms within the house plan.
3.1. Drawing Interior Walls:
Utilize the "Line" command again to create the interior walls. Carefully define each wall segment, ensuring that they meet at the corners and connect seamlessly with the exterior perimeter. For clarity, ensure that interior walls are drawn on a separate layer dedicated to walls.
3.2. Creating Rooms:
To define the individual rooms, use the "Hatch" command (found under the "Annotation" tab) to fill in the room areas with a solid color. When prompted, select the boundary of each room, ensuring its perimeter is formed by the house perimeter and the interior walls defining the room. You can create a unique hatch pattern and color for each room to easily differentiate them.
4. Adding Doors and Windows
Doors and windows are essential features in a floor plan.
4.1. Inserting Doors:
Utilize the "Door" command under the "Insert" tab. From the "Door" dialog box, select the door type and dimensions. Place the door by clicking on the desired location on the wall where the door will be installed.
4.2. Inserting Windows:
Similar to doors, access the "Window" command under the "Insert" tab. Choose the appropriate window type and dimensions, and then place the window on the wall using the cursor.
5. Dimensioning the Floor Plan
To ensure that the plan accurately represents the dimensions, add relevant dimensions.
5.1. Placing Dimension Lines:
Select the "Dimension" command from the "Annotation" tab. Choose the suitable dimension type (linear, angular, or radial) based on the measurements you wish to display. Click on the two points defining the length or angle you want to dimension.
5.2. Format and Style:
To ensure consistency, ensure that all dimensions are displayed in meters. Modify the dimension style to set the unit display and any preferred formatting.
6. Annotating the Floor Plan
Adding annotations to your floor plan enhances clarity.
6.1. Labeling Rooms:
Use the "Text" command from the "Annotation" tab to label the rooms. Click on the desired location within each room and type the room name. Adjust the text size and font to suit your preference.
6.2. Adding Furniture:
Insert furniture symbols to represent the placement of furniture, such as beds, tables, and chairs. Access the "Block" command under the "Insert" tab to insert pre-designed furniture blocks. Select the desired block from the library and place it within the room.
7. Saving and Exporting the Floor Plan
Once the floor plan is complete, it is essential to save and export it in an appropriate format.
7.1. Saving in AutoCAD Format:
Save your floor plan in the native AutoCAD format ".dwg". This format ensures compatibility with future editing and modification in AutoCAD.
7.2. Exporting to Other Formats:
For sharing purposes, export the floor plan in a more widely compatible format, such as ".pdf", ".jpg", or ".png". These formats enable the plan to be viewed and shared with individuals who may not have access to AutoCAD software.

Making A Simple Floor Plan In Autocad Part 1 Of 3

12 Examples Of Floor Plans With Dimensions

2 Bhk Small House Plan Autocad Drawing Dwg File Cadbull

Autocad House Plans With Dimensions

Autocad Floor Plan Tutorial For Beginners 6

Simple Two Bedroom House Plans With Dimension Cadbull

Making Simple 2 Bedroom Apartment Map Using Autocad

Complete Floor Plan For Your Dream Home Using Autocad Upwork

Basic Floor Plan Drafting In Autocad 7 Steps Instructables

2d Floor Plan In Autocad With Dimensions 38 X 48 Dwg And File Free
Related Posts


