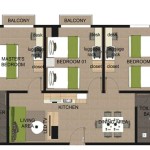
The Essential Guide to Proper Dimensioning of Floor Plans in Revit
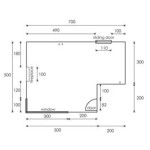
Dimensioning is a crucial aspect of creating accurate and informative floor plans in Revit. Proper dimensioning ensures that the relationships between different elements of a building are clearly defined and easily understood, which is essential for construction, renovation, and maintenance purposes.
This article provides a comprehensive guide to the proper way to dimension floor plans in Revit, covering key principles, best practices, and tips.
Principles of Dimensioning in Revit
The following principles should be followed when dimensioning floor plans in Revit:
- Use accurate measurements: Dimensions should be accurate and reflect the actual measurements of the building.
- Consistency: Use a consistent dimensioning style throughout the floor plan. This includes using the same font, size, and placement for all dimensions.
- Clarity: Dimensions should be clear and easy to read. Avoid overcrowding the floor plan with unnecessary dimensions.
- Relevance: Only include dimensions that are necessary for construction or understanding the layout of the building.
Best Practices for Dimensioning Floor Plans in Revit
Here are some best practices for dimensioning floor plans in Revit:
- Use the Dimension tool: The Dimension tool in Revit is a powerful tool that provides a wide range of options for dimensioning floor plans. It is recommended to use this tool for all dimensioning tasks.
- Use consistent units: Choose the appropriate units for the project and use them consistently throughout the floor plan.
- Snap to elements: When creating dimensions, snap to elements in the floor plan to ensure accuracy.
- Use alignment tools: Use the alignment tools in Revit to align dimensions horizontally or vertically.
- Use overrides:Overrides can be used to adjust the appearance of dimensions, such as the font, size, and precision.
Tips for Effective Dimensioning
Here are some additional tips for creating effective dimensions in Revit:
- Use dimension styles: Dimension styles can be created to save time and ensure consistency. Styles can be easily applied to multiple dimensions.
- Use dimension tags: Dimension tags can be used to provide additional information, such as room names or elevation levels.
- Use associative dimensions: Associative dimensions are linked to elements in the floor plan. If an element is moved, the dimension will automatically update.
- Check dimensions regularly: It is important to check dimensions regularly to ensure accuracy and consistency.
Conclusion
Proper dimensioning of floor plans in Revit is essential for creating accurate and informative drawings. By following the principles, best practices, and tips outlined in this guide, you can ensure that your floor plans are clear, concise, and easy to understand.

Revit Tutorial Dimensioning Floor Plan

Dimensions In Revit Beginner To Pro Tutorial

Revit Floor Plan Tutorial Bim Pure Blog

Floor Plan Dimensions In Revit

Help Part 11 Add Dimensions Autodesk

Revit Tip Entire Wall Dimensioning Envisioncad

Floor Plan Design In Revit Tutorial 5 Pro Tips

Revit Floor Plan Tutorial Bim Pure Blog

Dimensions In Revit Beginner To Pro Tutorial

14 Beginner Tips To Create A Floor Plan In Revit Design Ideas For The Built World
Related Posts


