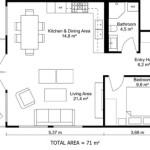
How to Put Dimensions on a Floor Plan AutoCAD Block
Adding dimensions to a floor plan AutoCAD block is essential for accurately conveying the scale and measurements of a space. Dimensions provide clear information about the size and layout of the room, making them indispensable for planning and construction purposes.
Steps to Add Dimensions to a Floor Plan AutoCAD Block:
- Prepare the Floor Plan Block:
- Create Dimension Style:
- Select Dimension Tool:
- Specify Dimension Points:
- Linear: Measures the distance between two points.
- Angular: Measures the angle between two lines or surfaces.
- Radial: Measures the radius or diameter of a circle or arc.
- Format Dimensions:
- Locate Dimension Lines:
- Check and Review:
Ensure the floor plan block is properly scaled and oriented within the AutoCAD drawing.
In the AutoCAD ribbon, navigate to the "Annotate" tab and click the "Dimension Style" button. Create a new dimension style or modify an existing one to customize the appearance and properties of the dimensions.
From the "Dimension" panel in the "Annotate" tab, select the appropriate dimension tool (e.g., linear dimension, angular dimension, etc.).
Click on the floor plan block to specify the points where the dimensions will be placed. The following dimensioning methods are available:
Adjust the dimensions to ensure they are clear and readable. Use the "Dimension Properties" dialog box to edit the text size, arrowhead style, and other formatting options.
Position the dimension lines and text in a way that maximizes their visibility and minimizes clutter on the drawing. Use the "Dimension Extension" and "Leader" tools to control the placement.
Thoroughly review the dimensions to ensure their accuracy and readability. Check for any errors or inconsistencies that may affect the interpretation of the floor plan.
Best Practices for Dimensioning Floor Plan Blocks:
- Use consistent dimensioning throughout the drawing to maintain clarity and uniformity.
- Avoid overcrowding the drawing with too many dimensions. Only include essential measurements that are necessary for understanding the space.
- Consider using dimension overrides to adjust the formatting of specific dimensions for clarity.
- Use text notes or labels to provide additional information or clarifications as needed.
- Regularly review and update dimensions to reflect any changes made to the floor plan block.
By following these steps and best practices, you can effectively add dimensions to your floor plan AutoCAD block, ensuring accurate and clear communication of the design intent.

How To Setup And Add Dimensions Floor Plans In Auto Cad

How To Set Dimensions Paper Size View Port And Scale In Autocad

Making A Simple Floor Plan In Autocad Part 1 Of 3

Adding Dimensions To Your Floor Plan

Full Building Plan Drawing In Autocad Part 1 Ground Floor

Basic Floor Plan Drafting In Autocad 7 Steps Instructables

Autocad Floor Plan Tutorial For Beginners 6

How To Set Your Dimensions In Autocad

Full Building Plan Drawing In Autocad Part 2 First Floor

Architecture House Ground Floor And First Plan Autocad Drawing Dwg File
Related Posts

