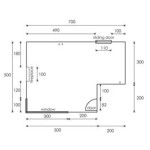
How to Dimension a Floor Plan in AutoCAD 3D
Adding dimensions to a floor plan in AutoCAD 3D is an essential step in the design and construction process. Dimensions provide accurate measurements of the space, ensuring that construction proceeds smoothly and the final product meets the intended design.
1. Enable the Dimension Toolbar
Start by enabling the Dimension toolbar. Go to the "View" tab, select "Toolbars," and then check the box for "Dimension."
2. Choose a Dimensioning Style
In the Dimension toolbar, click the "Dimension Style Manager" button. This will open a dialog box where you can choose the dimensioning style you want to use. Select a style that meets your specific requirements.
3. Set Dimension Properties
Before placing dimensions, you can set the default properties in the "Dimension Style Manager" dialog box. Adjust settings such as text size, arrows, and line types to match your project's needs.
4. Place Linear Dimensions
To place a linear dimension, click the "Linear" button in the Dimension toolbar. Select the two points you want to dimension, and AutoCAD will automatically create a dimension line with the measurement.
5. Place Aligned Dimensions
Aligned dimensions are useful for creating dimensions that are aligned with objects or grid lines. Click the "Aligned" button in the Dimension toolbar and select the alignment line and the dimension text position.
6. Place Radial Dimensions
To create a radial dimension, click the "Radial" button in the Dimension toolbar. Select the arc or circle you want to dimension and the center point. AutoCAD will automatically create a radial dimension with the radius or diameter.
7. Place Angular Dimensions
Angular dimensions measure the angle between two lines. Click the "Angular" button in the Dimension toolbar and select the two lines you want to dimension. AutoCAD will automatically create an angular dimension with the angle measurement.
8. Edit and Adjust Dimensions
To edit or adjust dimensions, select the dimension and then use the grips or dimension properties dialog box to make changes. You can move, resize, and modify the text or arrows as needed.
9. Dimension Complex Elements
AutoCAD 3D allows you to dimension complex elements such as stairs, walls, and openings. Use the appropriate dimensioning tools in the Dimension toolbar to create accurate measurements for these elements.
10. Dimensioning Best Practices
Follow these best practices when dimensioning floor plans:
- Use consistent dimensioning styles throughout the drawing.
- Place dimensions in clear and visible locations.
- Avoid overlapping or conflicting dimensions.
- Ensure that dimensions are accurate and up-to-date.
- Use dimension labels to clarify the meaning of dimensions.

How To Convert 2d Floor Plan 3d In Autocad

Autocad Complete 2d And 3d House Plan Part 1

Making A Simple Floor Plan In Autocad Part 1 Of 3

How To Set Your Dimensions In Autocad

How To Convert 2d Floor Plan 3d In Autocad

Autocad Floor Plan Tutorial For Beginners 6

Floor Plan Tools For 2d 3d Plans Autodesk

Full Building Plan Drawing In Autocad Part 1 Ground Floor

Autocad Drawing And Coohom Design 3d Fast Rendering Blog

Autocad Tutorial How To Draw A 2d And 3d Floor Plan In For Beginners Part 1
Related Posts

