How To Make a Floor Plan on SketchUp
SketchUp is a versatile 3D modeling software widely used by architects, interior designers, and hobbyists alike. Its intuitive interface and extensive features make it an ideal tool for creating detailed floor plans. This article provides a comprehensive guide on how to create a floor plan using SketchUp, from initial setup to adding essential details.
Before starting, ensure access to the SketchUp software, either the free web version (SketchUp Free) or a paid subscription (SketchUp Pro). While SketchUp Free offers basic functionality, SketchUp Pro provides advanced tools and features that can streamline the floor plan creation process. Familiarize oneself with the SketchUp interface, including the toolbars, drawing tools, and measurement tools, before beginning the project.
Setting Up The SketchUp Workspace
The initial step is to configure the SketchUp workspace to suit the floor plan's scale and units. Start by opening SketchUp and selecting a suitable template. For architectural projects, the architectural template is recommended as it typically defaults to feet and inches or meters, depending on the region. It is essential to use the appropriate units for the project to maintain accuracy.
To verify and adjust the template settings, navigate to the "Window" menu and select "Model Info." In the Model Info window, select "Units." Here, the format (architectural, decimal, engineering, fractional), units (inches, feet, meters, centimeters, millimeters), and precision can be defined. For a floor plan intended for construction or precise measurements, selecting "Architectural" units with appropriate precision (e.g., 1/16" or 1mm) is crucial.
Next, establish a reference point. This is usually the origin of the axes (the point where the red, green, and blue axes intersect). Using the Tape Measure tool, create guidelines to define the perimeter of the building. Input precise measurements using the keyboard and the value box that appears in the lower right corner (typically labeled "Measurements"). For example, to create a guideline 20 feet from the origin along the red axis, click the origin, move the cursor along the red axis, type "20'", and press Enter. Repeat this process to establish the overall dimensions of the floor plan.
The Rectangle tool can then be used to draw the outer walls based on the established guidelines. Click at one corner of the defined perimeter and drag to the opposite corner, ensuring that the rectangle aligns precisely with the guidelines. The resulting rectangle represents the outer boundaries of the floor plan.
Drawing Walls And Interior Partitions
With the basic outline established, the next step is to draw the walls and interior partitions. Use the Offset tool to create an inner rectangle representing the interior space. Select the outer rectangle and then activate the Offset tool. Click inside the rectangle and drag the cursor inward. Input the desired wall thickness, for example, "6"" for a 6-inch wall. This creates two rectangles, the space between them representing the walls.
The Line tool is then utilized to draw interior walls, partitioning the space into rooms. Plan the layout of the rooms based on the intended functionality of the building. Click on the inside edge of the exterior walls and draw lines indicating the position of the interior walls. Ensure that the lines are parallel to the appropriate axes for accuracy.
When drawing interior walls, accurately inputting dimensions is essential. Use the Tape Measure tool to create guidelines indicating the precise location of the walls. Alternatively, use the Line tool to draw a temporary line, dimension it using the Tape Measure tool, and then move the line to the desired location using the Move tool. This ensures accurate placement of the interior walls.
The Push/Pull tool is then used to give the walls height. Select the areas representing the walls and drag them upwards. Input the desired wall height, for example, "9'" for a 9-foot ceiling. This creates three-dimensional walls based on the two-dimensional lines drawn earlier.
To ensure proper alignment and continuity of the walls, it is crucial to clean up any intersecting lines or overlaps that may occur. Use the Eraser tool to remove any unnecessary lines or segments. Zoom in to ensure that all intersections are clean and that the walls are properly connected.
Adding Doors, Windows, and Architectural Details
After creating the basic wall structure, the next step is to add doors, windows, and other architectural details. These elements can be either drawn manually or imported from SketchUp's 3D Warehouse, a vast library of pre-made models. The 3D Warehouse often provides components like doors and windows that can be easily scaled and inserted into the floor plan.
To create a door opening, first use the Tape Measure tool to mark the location and dimensions of the door. For example, a standard door opening is typically 36 inches wide. Draw a rectangle using the Rectangle tool to represent the door opening. Use the Push/Pull tool to push the portion of the wall within the rectangle until it disappears, creating an opening.
Either create a door using basic shapes or import one from the 3D Warehouse. Search for "door" in the 3D Warehouse and select a suitable model. Download the model and insert it into the floor plan. Use the Move tool to position the door within the opening and the Rotate tool to adjust its orientation. Scale the door appropriately using the Scale tool to fit the opening precisely.
The process for creating windows is similar. Use the Tape Measure tool to mark the location and dimensions of the windows. Draw rectangles to represent the window openings and use the Push/Pull tool to create openings. Import window models from the 3D Warehouse or create custom window designs using basic shapes. Ensure the imported/created window is positioned correctly within the opening.
Other architectural details, such as stairs, columns, fireplaces, and built-in furniture, can also be added using the same techniques. Consider utilizing the 3D Warehouse for complex features or creating components from basic shapes for a more custom design. Remember to group similar elements together using the "Make Group" function to keep the model organized and easier to manage.
Adding details like windows and doors may require cutting through the walls. SketchUp has native tools, like the Solid Tools (available in SketchUp Pro), to cut openings. Alternatively, Boolean operations can be employed using plugins. These operations allow for subtraction of solids, which is useful for creating openings for windows and doors.
Utilizing layers effectively improves model organization. Assign different elements of the floor plan (walls, doors, windows, furniture) to different layers. This enhances control over the model's visibility and allows for selective editing. The Layers panel also enables to control the properties of each layer, such as line style and color.
Adding furniture and fixtures helps visualize the layout and functionality of the space. Import furniture models from the 3D Warehouse or create custom furniture pieces using basic shapes. Position the furniture within the rooms to demonstrate the intended use of the space.
Once satisfied with the layout, add annotations to the floor plan. Use the Text tool to add labels to rooms, indicating their function (e.g., "Living Room," "Bedroom," "Kitchen"). Add dimensions to the walls, doors, and windows to provide accurate measurements. These annotations are essential for communicating the design to others.
To finalize the floor plan, create a 2D drawing from the 3D model. Select "Camera" and then "Standard Views" and then "Top." This provides a plan view of the floor plan. Then, use the "File" menu, select "Export", and choose "2D Graphic" to export the floor plan as a JPEG or PNG file. For higher quality exports, consider using "Export" and choosing "3D Model" to export to DWG or DXF, which can be opened in CAD software for further refinement.

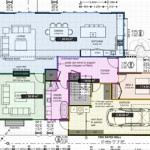
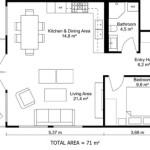
Layout Floor Plan Pro Sketchup Community

Creating A Simple Floor Plan Sketchup Community

How To Make Floor Plans For Free In Sketchup

Sketchup Tutorial How To Create A Quick Floor Plan

Sketchup Floor Plan Tutorial For Beginners 2

How To Draw Floor Plans In Sketchup Edrawmax

How To Create A Floor Plan With Sketchup Easy Steps

Creating A Floor Plan In Layout With Sketchup 2024 S New Tools Apartment For Part 5

Create A Floor Plan Only In 2d Or Layout Pro Sketchup Community

Expert Tips On How To Create A Professional Floor Plan Sketchup Hub
Related Posts