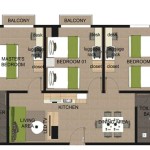
How To Make A Floorplan Of Your House
Creating a floorplan of a house can be beneficial for various reasons. Whether planning a renovation, designing interior decor, or simply needing an accurate record of the property's layout, a well-executed floorplan is an invaluable tool. This article outlines a step-by-step process for creating a comprehensive and accurate floorplan of a house, ensuring that the final product meets the user's intended needs.
The process involves careful measurement, accurate representation of architectural features, and diligent attention to detail. While professional architectural software offers advanced features, a functional and informative floorplan can be created using basic tools and a methodical approach. This guide provides instructions for both manual and digital methods, allowing individuals to choose the method that best suits their skills and resources.
Gathering the Necessary Tools and Materials
Before embarking on the process of creating a floorplan, it is crucial to assemble the right set of tools and materials. These will vary depending on the chosen method, but some core items are essential for both manual and digital approaches. Accuracy is paramount, so investing in quality tools is a worthwhile consideration.
For manual floorplan creation, a measuring tape (preferably a long one, 25 feet or more) is essential. A clipboard or notepad will serve as a surface for sketching preliminary layouts and recording measurements. A pencil and eraser are indispensable for making adjustments and corrections throughout the drawing process. A ruler or straight edge will ensure that lines are straight and measurements are accurately represented on the paper. A laser distance measurer can significantly expedite the measuring process and improve accuracy, especially for larger rooms or complex layouts.
For digital floorplan creation, a computer or tablet is required. Software options range from free online tools to professional-grade architectural design programs. Some popular options include SketchUp, AutoCAD, and RoomSketcher. A printer will be needed to produce hard copies of the floorplan. A laser distance measurer remains a valuable asset for efficiently gathering accurate measurements, which can then be directly input into the digital software. Digital floorplan applications often include tools to measure and annotate the electronic document.
Measuring the House Accurately
The foundation of any good floorplan is precise measurements. Inaccurate measurements will lead to a flawed representation of the house's layout, rendering the floorplan less useful for its intended purpose. A systematic approach to measurement is crucial for ensuring accuracy and efficiency.
Begin by sketching a rough outline of the house's perimeter. This initial sketch does not need to be perfectly to scale, but it should accurately represent the shape of the house. Note the location of all exterior walls, doors, and windows on the sketch. This provides a visual reference point for the subsequent measurement process.
Measure the length of each exterior wall, recording the measurements on the sketch. It is important to measure the walls from the inside face, as this is the area within the walls. Pay close attention to corners and ensure that measurements are taken accurately at each point. For interior rooms, measure the distance between walls, again from inside face to inside face. Note the thickness of interior walls, as this data will be needed to accurately plot the floorplan. Measure the width and height of all doors and windows, as well as their placement in relation to the walls. This data is essential for accurate representation of these features on the floorplan.
When measuring interior spaces, it can be helpful to break down complex rooms into smaller, more manageable sections. For example, an L-shaped room can be measured as two separate rectangles. Measure any built-in features, such as fireplaces, cabinets, or closets, and note their dimensions and location. Be consistent with units of measurement, choosing either feet and inches or metric units and sticking with that choice throughout the entire process. For irregularly shaped spaces, take multiple measurements at different points to ensure an accurate representation. When taking measurements within the walls themselves, it is crucial to note the measurement from the studs, not from the drywall surface so the dimensions are accurate.
Creating the Floorplan: Manual Method
The manual method of creating a floorplan involves drawing the layout by hand, using the gathered measurements and a ruler to create a scaled representation of the house. This method requires patience and attention to detail, but it can be a cost-effective way to produce a functional floorplan.
Choose a suitable scale for the floorplan. A common scale is 1/4 inch equals 1 foot, meaning that every 1/4 inch on the drawing represents 1 foot in the actual house. Select a scale that allows the entire floorplan to fit comfortably on the paper. Begin by drawing the exterior walls of the house, using the measurements taken earlier. Use a ruler to ensure that the lines are straight and the proportions are accurate. Double-check the measurements against the original sketch to minimize errors.
Once the exterior walls are drawn, add the interior walls. Use the wall thickness measurements to accurately represent the thickness of each wall. Draw the walls in their correct locations, using the measurements taken earlier. Mark the locations of doors and windows. Use the measurements to draw the openings for doors and windows to the correct size and position. Add symbols to represent doors and windows. For example, a door can be represented by a line with an arc indicating the direction of the swing. Windows can be represented by two or three lines parallel to the wall.
Add details such as built-in features, appliances, and furniture. These details can help to visualize the space and make the floorplan more useful for planning purposes. Label each room with its name and dimensions. This will make the floorplan easier to understand. Review the floorplan carefully to ensure that all measurements are accurate and that all features are correctly represented. Make any necessary corrections or adjustments. Once satisfied with the floorplan, consider inking the lines to create a more permanent and professional-looking document.
Creating the Floorplan: Digital Method
The digital method of creating a floorplan involves using computer software to draw the layout. This method offers greater flexibility and precision compared to the manual method, and it allows for easy editing and revisions. It is a more effective method for planning dimensions, as the measurements can be edited and adjusted as needed.
Choose a suitable floorplan software program. Several free and paid options are available, each with its own features and capabilities. Select a program that meets the specific needs and skill level of the user. Start a new project in the software and set the appropriate scale. The scale should be consistent with the scale used for the manual method (e.g., 1/4 inch equals 1 foot). Input the exterior wall measurements into the software. Use the software's drawing tools to create the exterior walls of the house. Many programs allow for direct input of measurements, ensuring accuracy.
Add the interior walls. Use the wall thickness measurements to accurately represent the thickness of each wall. Draw the walls in their correct locations, using the measurements taken earlier. Insert doors and windows from the software's library of symbols. Position the doors and windows in their correct locations, using the measurements taken earlier. Adjust the size of the doors and windows to match the actual dimensions.
Add details such as built-in features, appliances, and furniture. Most floorplan software programs have libraries of symbols for common features, making it easy to add these details to the floorplan. Label each room with its name and dimensions. Use the software's text tools to add labels to each room. Review the floorplan carefully to ensure that all measurements are accurate and that all features are correctly represented. Use the software's editing tools to make any necessary corrections or adjustments. Save the floorplan in a suitable file format, such as PDF or DWG. This will allow the floorplan to be easily shared and printed. The floorplan can be edited in the editing features of the chosen software.
Adding Details and Annotations
A basic floorplan provides a representation of the house's layout, but adding details and annotations can significantly enhance its usefulness. These additions provide context and information that make the floorplan more valuable for planning and communication.
Indicate the location of electrical outlets and switches. This information is essential for planning electrical work or designing lighting layouts. Use standard symbols to represent outlets and switches, ensuring that the floorplan is easily understood by electricians and other professionals. Show the location of plumbing fixtures, such as sinks, toilets, and showers. This information is crucial for planning plumbing work or designing bathroom layouts. Use standard symbols to represent plumbing fixtures.
Indicate the direction of door swings. This information is helpful for visualizing how doors will operate and for planning furniture placement. Use an arc to show the direction of the door swing. Label the materials used for walls and floors. This information can be useful for planning renovations or repairs. Use abbreviations or symbols to represent different materials. Add notes to clarify any specific features or conditions. For example, a note could be added to indicate the presence of a load-bearing wall or the location of a hidden pipe. Include the date the floorplan was created. This information helps to keep track of different versions of the floorplan and to ensure that the most up-to-date version is being used.
Add dimensions to specific features, such as countertops or islands. These dimensions can be helpful for planning renovations or purchasing furniture. Include a north arrow to indicate the orientation of the house. The accuracy of the North arrow is essential. This information is helpful for understanding the direction of sunlight and for planning outdoor spaces. Incorporate annotations explaining any specific design features or constraints. These annotations are useful for conveying specific intentions and instructions to contractors, interior designers, or other stakeholders involved in the project. Such as measurement from studs within the walls, or the floor being uneven, noting this kind of information improves the accuracy of the floorplan.

Create A Floor Plan Of Your House Instructables

Design Your Own House Floor Plans Roomsketcher

Design Your Own House Floor Plans Roomsketcher

How To Draw Floor Plans With Floorplanner Com Young House Love

Create A Floor Plan Of Your House Instructables

Floor Plans Learn How To Design And Plan

How To Draw Blueprints For A House With Pictures Wikihow

How To Draw A Floor Plan Live Home 3d

How To Make Floor Plans For Free In Sketchup

Floor Plan Creator And Designer Free Easy App
Related Posts


