How to Make a Floor Plan of Your House
Creating a floor plan of a house serves numerous valuable purposes. It can aid in interior design projects, facilitate renovations, assist in emergency planning, provide documentation for insurance purposes, and improve the overall understanding of spatial relationships within a dwelling. The process, while initially daunting, can be broken down into manageable steps.
Accuracy is paramount when generating a floor plan. Even small discrepancies in measurements can accumulate, leading to significant errors in the final representation. Therefore, using appropriate tools and meticulous measuring techniques is crucial. The following outlines a comprehensive methodology for creating an accurate and usable floor plan.
Gathering Necessary Tools and Materials
Before commencing the creation of a floor plan, assembling the necessary tools and materials is essential. A comprehensive toolkit will ensure accuracy and efficiency throughout the process. The following items are recommended:
Measuring Tape: A retractable measuring tape, preferably one that extends at least 25 feet, is fundamental. Look for a tape measure with a clear, easy-to-read scale, and consider one with a locking mechanism to maintain accurate measurements.
Laser Distance Measurer: While not absolutely essential, a laser distance measurer significantly streamlines the process, particularly for measuring long distances or hard-to-reach areas. These devices use a laser beam to accurately determine distances, eliminating the need for manual tape extension and potential measurement errors.
Graph Paper or Architectural Grid Paper: Graph paper, with its pre-printed grid, aids in maintaining proportions and drawing accurate lines. Architectural grid paper typically uses a finer grid and is preferred for more detailed floor plans. Choose a grid scale appropriate for the size of the house; for instance, ¼ inch squares representing one foot is a common and useful scale.
Pencils and Eraser: Standard pencils (preferably a mechanical pencil for consistent line thickness) are needed for drawing the floor plan. A good quality eraser is essential for correcting any errors.
Clipboard or Hard Surface: A clipboard or other hard surface provides a stable base for drawing and taking notes while moving throughout the house.
Note-Taking Device: A notebook or a digital device (tablet or smartphone) for recording measurements and notes. Using a digital device allows for easy organization and potential integration with floor plan software.
Door and Window Template or Stencils: These templates, available at most art supply or drafting stores, provide pre-drawn shapes for doors and windows, simplifying the process of accurately representing these features on the floor plan.
Level: A small level will be needed to check the plumb of walls and the level of floors, as discrepancies in these areas can impact the accuracy of the floor plan.
Measuring and Recording Room Dimensions
The core element of creating a floor plan involves meticulously measuring and recording the dimensions of each room. This requires a systematic approach to minimize errors and ensure consistency.
Start with a Rough Sketch: Before taking any measurements, create a simple sketch of the house's layout. This sketch doesn't need to be precise; it serves as a visual reference for organizing measurements and ensuring that all rooms and features are accounted for. Include approximate locations of doors, windows, and any built-in elements like fireplaces or cabinets.
Establish a Starting Point: Choose a room, ideally one with relatively straight walls and clear corners, to begin the measuring process. This will serve as the anchor for the entire floor plan.
Measure Wall Lengths: Use the measuring tape or laser distance measurer to determine the length of each wall in the room. Record each measurement clearly in the notebook or digital device, labeling the wall with a descriptive identifier (e.g., "North Wall," "Wall with Window"). Measure wall lengths at the floor level.
Measure Room Widths: Similar to wall lengths, measure the width of the room at several points to account for any irregularities. Walls are not always perfectly parallel or straight. Note any variations in width on the rough sketch to ensure accuracy.
Measure Door and Window Openings: Precisely measure the width and height of all door and window openings. Also, measure the distance from each opening to the nearest corner or wall. Record the "trim to trim" measurement of the opening, which is the inside measurement of the frame, for accuracy. Note the swing direction of each door (left or right) on the sketch, as this is crucial for planning furniture placement and traffic flow.
Measure Wall Thickness: Determine the thickness of the walls. This is crucial for accurately representing the overall dimensions of the house. This can be done at door or window openings or by measuring an exposed section of the wall (e.g., in a closet or unfinished area). For exterior walls, measure the thickness including siding or other exterior cladding.
Measure Ceiling Height: Determine the ceiling height of each room. In most houses, ceiling height is consistent throughout, but variations may exist, particularly in older homes or those with modified layouts.
Measure and Note Built-in Features: Accurately measure and record the dimensions of any built-in features, such as fireplaces, cabinets, bookshelves, or appliances. Note their location relative to the walls and corners of the room. Measure the height, width, and depth of these elements.
Account for Irregularities and Offsets: Pay close attention to any irregularities in the walls, such as offsets, recesses, or protrusions. Measure the dimensions of these features and their distance from the nearest corner or wall. These details are often overlooked but can significantly impact the accuracy of the floor plan.
Repeat for Each Room: Follow the same measuring process for each room in the house. Ensure that adjacent rooms are measured relative to each other to maintain consistency in the overall floor plan. Maintain consistent units of measurement throughout the entire process (either inches or centimeters).
Transferring Measurements to the Floor Plan
Once all the necessary measurements are collected, the next step involves transferring them accurately to the graph paper or architectural grid paper to create the floor plan. This process requires careful attention to scale and detail.
Choose a Scale: Select an appropriate scale for the floor plan. Common scales include ¼ inch equals one foot (1:48) or ⅛ inch equals one foot (1:96). The choice of scale depends on the size of the house and the desired level of detail. A smaller scale is suitable for larger houses, while a larger scale allows for more intricate representation.
Start with Exterior Walls: Begin by drawing the exterior walls of the house, using the measured dimensions and the chosen scale. Ensure that the corners are square and that the walls are parallel or perpendicular to each other, unless otherwise indicated by the measurements.
Draw Interior Walls: Once the exterior walls are established, draw the interior walls, using the measured dimensions and the established scale. Pay close attention to the wall thicknesses and the relative positions of the walls within the house.
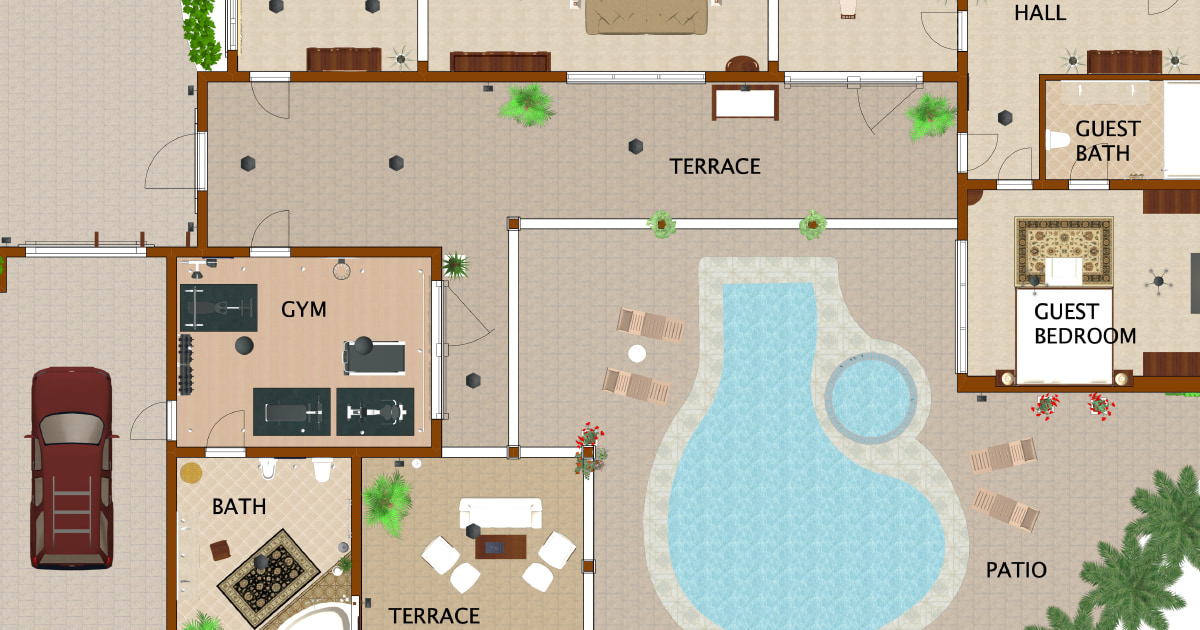
Add Doors and Windows: Use the door and window templates or stencils to accurately represent these features on the floor plan. Ensure that the size and placement of the doors and windows correspond to the measured dimensions. Indicate the swing direction of each door with an arc.
Represent Built-in Features: Draw the built-in features, such as fireplaces, cabinets, bookshelves, and appliances, using the measured dimensions and the chosen scale. Accurately represent their location and size relative to the walls of the room.
Label Rooms and Features: Clearly label each room and feature on the floor plan. This helps to identify the different spaces and elements of the house.
Check for Accuracy: After completing the floor plan, carefully review all measurements and drawings to ensure accuracy. Compare the floor plan to the rough sketch and the original measurements to identify and correct any errors. This is an iterative process, and multiple revisions may be necessary to achieve an accurate representation.

Floor Plan Creator And Designer Free Easy App

Floor Plans Learn How To Design And Plan

How To Draw A Floor Plan Live Home 3d

Make Your Own Blueprint How To Draw Floor Plans

House Plans How To Design Your Home Plan

Make Your Own Floor Plans

Make Your Own Blueprint How To Draw Floor Plans Drawing House Sketch Plan

House Plans How To Design Your Home Plan

Floor Plans Learn How To Design And Plan

Tips For Selecting The Right Floor Plan Your Home Sater Design Collection
Related Posts


