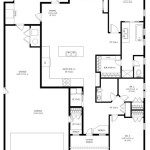
How to Make a Floor Plan for Beginners in Blender
Creating a floor plan is an essential skill for architects, designers, and anyone involved in home renovation or construction. Blender, a free and open-source 3D modeling software, provides a powerful and user-friendly platform for crafting detailed and accurate floor plans. This guide will walk you through the fundamental steps of creating a floor plan using Blender, tailored for beginners with no prior experience.
1. Setting Up the Scene
Start by launching Blender and navigating to the "Layout" workspace. This workspace offers a dedicated area for creating and managing floor plans. Create a new "Orthographic" camera by pressing Shift+A and selecting "Camera." Position the camera directly above the scene, looking straight down. This top-down view is crucial for a clear floor plan perspective.
Next, enable the "Floor" addon by going to the "Edit" menu, then "Preferences." In the "Add-ons" tab, search for "Floor" and enable it. This addon provides a convenient tool for quickly creating and manipulating floor surfaces within the scene.
2. Building Walls and Rooms
With the floor addon activated, select it from the "Add" menu, choose "Mesh," and then select "Floor" to create your foundation. Resize the floor to match the desired dimensions of your floor plan. For walls, use the "Cube" primitive from the "Add" menu. Create individual cubes representing each wall and adjust their dimensions accordingly.
Blender's "Transform" tools (using G, R, and S keys) allow you to move, rotate, and scale objects precisely. Use this to position the walls accurately, connecting them to form rooms. Ensure the walls are aligned to the floor surface to create a cohesive design.
3. Adding Doors and Windows
To add doors and windows, use the "Add" menu and select "Mesh." Choose "Plane" to create a basic rectangular shape that will represent the doorway or window. Adjust its size and position within the wall. You can then use the "Extrude" operation (E key) to give the doorway or window its depth.
For window frames, create thin rectangular planes using the "Plane" primitive. Place them around the window opening and use the "Boolean" modifier to create cutouts in the surrounding wall. This process can also be used to add door frames.
4. Adding Details and Textures
To enhance your floor plan, add details such as furniture, appliances, and fixtures. Model these using basic shapes like cubes, cylinders, and spheres, customizing their size and appearance. Adding these details will greatly improve the realism of your floor plan.
Blender offers a vast library of materials and textures that can be applied to your objects. Explore the "Materials" tab within the properties panel to find a wide range of textures, including wood, tile, and carpet. Applying these textures to your objects will create a more accurate visual representation. You can also create custom materials using Blender's material editor.
5. Final Touches and Rendering
Once your floor plan is complete, you can apply further refinements. Use the "Smooth" modifier to soften the edges of objects for a more realistic look. Experiment with lighting to create a visually appealing scene. You can add a directional light source from above to simulate sunlight or use ambient lighting for a more subtle illumination.
Finally, it's time to render your floor plan. Blender's integrated rendering engine allows you to create high-quality images of your design. Explore the "Render" settings to customize the output quality and resolution. You can also import your floor plan into other software like AutoCAD or SketchUp for further refinements and modifications.

How To Make 3d Floor Plan In Blender Best Method Modeling

How To Make 3d Floor Plan In Blender

Blender Architecture Addon Tutorial Interior Design Floor Plan To 3d

How To Turn 3d Model Into 2d Floor Plans In 2 Easy Steps

Family House Design And Project Using Floss Blender 3d Architect

Create A 3d Floor Plan Model From An Architectural Schematic In Blender Envato Tuts

Create A 3d Floor Plan Model From An Architectural Schematic In Blender Envato Tuts

Easy Floor Plans In Blender With Homebuilder Free Add On

Create A 3d Floor Plan Model From An Architectural Schematic In Blender Envato Tuts

How To Make 3d Floor Plan In Blender Best Method Modeling
Related Posts

