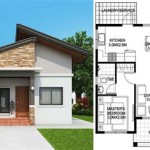
Creating a 3D Floor Plan in SketchUp: Essential Aspects
SketchUp is a powerful 3D modeling software that allows users to create detailed and realistic floor plans. Whether you're an architect, interior designer, or simply someone looking to visualize your home, SketchUp offers a user-friendly platform to bring your ideas to life. Here are the essential aspects of creating a 3D floor plan in SketchUp:
1. Planning and Measurements
Before you start modeling, it's crucial to gather accurate measurements and create a detailed plan of your floor layout. This will provide a solid foundation for your SketchUp model and ensure its accuracy. Measure the dimensions of each room, including walls, windows, and doors. Take note of any special features or architectural elements that need to be incorporated.
2. Drawing the Floor Plan
In SketchUp, start by importing your measurements or drawing a rectangle to represent the perimeter of your floor plan. Use the "Tape Measure" tool to measure and draw walls, windows, and doors to scale. Pay attention to the thickness of walls and the placement of windows and doors to create a realistic model.
3. Creating 3D Geometry
Once you have a 2D floor plan, you can begin creating the 3D geometry. Use the "Push/Pull" tool to extrude walls to their desired height. Add depth to windows and doors by "Pushing" inwards. To create complex shapes or curved walls, use the "Curved Surface" tool.
4. Adding Furniture and Fixtures
To bring your floor plan to life, add furniture, fixtures, and other elements that will populate the space. SketchUp offers a vast library of 3D models, or you can import your own models from the 3D Warehouse. Position and arrange furniture and fixtures to create a realistic and functional layout.
5. Materials and Textures
Apply materials and textures to your floor plan to enhance its realism. Select from a variety of materials, such as wood, tile, carpet, or glass. Use the "Paint Bucket" tool to apply materials to surfaces and add textures to create a natural look. Adjust the lighting and shadows to create a realistic environment.
6. Creating Sections and Elevations
Sections and elevations are important for visualizing the interior and exterior of your floor plan. Use the "Section Plane" tool to create a vertical cut through your model to reveal the internal structure or layout. Create elevations by projecting your model onto one of the coordinate planes.
7. Rendering and Exporting
Once your floor plan is complete, you can render it to create a photorealistic image or animation. Choose from various rendering styles, such as realistic, sketchy, or toon, depending on your desired effect. Export your floor plan in a variety of formats, including 2D images, 3D models, or virtual reality (VR) environments for further use or presentations.
Conclusion
Creating a 3D floor plan in SketchUp involves a combination of planning, geometry creation, and detailing. By following these essential aspects, you can produce accurate, visually appealing, and functional floor plans that will enhance your design projects or home improvement ideas.

How To Make A 3d Floor Plan Interior Design In Sketchup Free Udemy

Sketch Floor Plan To 3d In Sketchup

Sketchup Tutorial How To Turn 2d Floor Plans Into 3d Models In 5 Easy Steps

Render Of 3d Floor Plan Sketchup Community

Creating 3d Floor Plans In Sketchup Part 1 The Essentials 22

3d Floor Plan With Sketchup Vray Free Model By Umairf Cad Crowd

Sketch Floor Plan To 3d In Sketchup

Creating 3d Floor Plans In Sketchup Part 1 The Essentials 22

I Will Make Your 3d Floor Plan By Using Sketchup Tools

Sketch Floor Plan To 3d In Sketchup
Related Posts

