How To Make a 3D Floor Plan in Blender
Blender is a powerful and versatile 3D modeling software that can be used for a wide range of projects, including creating realistic and detailed 3D floor plans. While Blender is known for its powerful features, it can seem daunting for beginners. This article aims to provide a step-by-step guide on how to create a 3D floor plan in Blender, breaking the process down into manageable steps and focusing on the core concepts.
1. Setting Up the Scene
The first step is to set up the scene in Blender. This involves defining the basic elements of your floor plan, such as the dimensions and the overall layout. To begin, open Blender and select the "New" option. You will be presented with a default 3D scene. This scene includes a camera, a light source, and a cube object that will be used as a starting point.
To define your floor plan dimensions, you need to adjust the scene's scale. Blender uses metric units, so you'll need to ensure the units are set to meters. You can achieve this by navigating to the "Scene" tab in the Properties panel, located on the right side of the interface. Within the Scene tab, you can change the "Unit" setting to "Meters." This will allow you to work with realistic measurements for your floor plan.
The next crucial step is to create a plane representing your floor. In the "Add" menu, navigate to "Mesh" and select "Plane." This will add a flat surface to your scene. This plane will serve as the foundation of your floor plan. You can adjust the size of the plane by selecting it in the "Object" tab of the Properties panel and modifying the X and Y dimensions as needed. To avoid seeing the back side of the plane, navigate to the "Shading" tab in the Properties panel and change the "Backface Culling" option to "On."
2. Modeling Room Walls
Creating the walls of your rooms starts with understanding how Blender works with modeling. The primary tool for creating walls is the "Extrude" function. This function allows you to push a face in a direction to create a new shape. Each wall will be a separate object, making it easier to modify and adjust them independently. You'll use two methods to create walls: using the "Extrude" function on the plane and adding a new "Cube" object.
To begin, select the plane representing your floor. In the "Edit" mode, select the edge that corresponds to one of the walls of your floor plan using the "Edge Select" mode. Click the "Extrude" button located in the "Mesh" menu. While holding down the "Shift" key, pull the extruded edge upward to create the height of the wall. You can adjust the height as needed. Repeat this process for each wall of your floor plan, ensuring they connect seamlessly. You can also add a bevel to the edges of the walls for a more realistic look. This can be done by selecting an edge and navigating to the "Bevel" tool in the toolbar.
For rooms that don't share an edge with the outside wall, you'll use the "Cube" object. Add a new "Cube" from the "Add" menu. Resize the "Cube" to match the dimensions of the desired room. Position the "Cube" so it touches the existing walls and overlaps slightly where the walls intersect. In the "Edit" mode, select the faces of the "Cube" that overlap with the existing walls, and click the "Dissolve" button to merge the faces. Repeat this process for each room, ensuring the walls connect seamlessly. You can also add a bevel to the edges of the walls for a more realistic look.
3. Adding Details and Furniture
After setting up the basic structure of your floor plan, you can add details and furniture to make it more realistic and functional. This involves adding doors, windows, and fixtures like countertops and cabinets. It is important to note that adding these elements can significantly increase the complexity of the model.
To add a door to a wall, you can use the "Add" menu to select "Mesh" and then select the "Plane." You'll need to adjust the size and position of the plane so it matches the dimensions of the desired doorway. You can then use the "Extrude" function to create the thickness of the door. You can also use the "Bevel" tool to soften the edges for a more realistic look. Repeat this process for any additional doors.
Similar to doors, windows can be added using a new "Plane" object. Adjust its size and position, and use the "Extrude" function to create depth. Consider using a modifier like "Subsurf" to create a smoother surface for the window. Adding a window to a wall might require using the "Boolean" modifier, which allows subtracting objects from each other. This lets you "cut out" space for the window from your wall. You can find this modifier in the "Modifiers" tab in the Properties panel.
To add furniture, you can use the same methods as the walls, creating them out of "Cubes," "Planes," or "Cylinders." Adjust the size, position, and shape of the furniture to match your design. You can also use the "Array" modifier to create multiple identical objects, for example, arranging multiple chairs around a table.

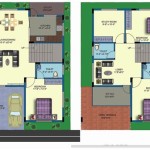
How To Create A 3d Floor Plan In Blender 3 0

How To Make 3d Floor Plan In Blender Beginners Guide Part 1

How To Make 3d Floor Plan In Blender Beginners Guide Part 1

Modeling Floor Plans From Images In Blender Step By Tutorial Part 1

Blender How To Create 2d Floor Plan And 3d House Basic Tutorial

Sketching A Floor Plan In Blender 3d Architect

Create A 3d Floor Plan Model From An Architectural Schematic In Blender Blendernation

Blender For Noobs 10 How To Create A Simple Floorplan In

Floor Plan Design In Blender How To Model House From

Create A 3d Floor Plan Model From An Architectural Schematic In Blender Envato Tuts
Related Posts