How to Make a 3D Floor Plan in 3ds Max 2020
Creating a 3D floor plan in 3ds Max allows for a more immersive and visually appealing representation of architectural designs. This guide outlines the process, from importing 2D plans to adding textures and lighting for a realistic presentation.
1. Importing the 2D Floor Plan
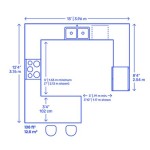
The foundation of a 3D floor plan is the 2D drawing. This can be imported into 3ds Max in various formats, such as DWG, DXF, or even a simple image file (JPG, PNG). When importing CAD files, ensure units are correctly configured to maintain accurate scale within the 3ds Max scene. If using an image, use the "Bitmap" option in the Import dialog box. Proper scaling needs to be established with image imports, typically done by measuring a known dimension in the image and setting the corresponding dimension within 3ds Max.
2. Creating Walls
With the 2D plan in place, the next step is to create the walls. This can be achieved using several methods. One common approach is to use the "Line" tool to trace over the wall outlines in the imported 2D plan. This creates splines, which can then be extruded using the "Extrude" modifier to give them height. Alternatively, if working from a CAD file, wall lines may already be represented as splines. The "Shapes" category in the "Create" panel also offers primitives like rectangles that can be positioned and scaled to form walls. Ensure appropriate wall thickness is applied during extrusion or object creation.
3. Adding Doors and Windows
Doors and windows are essential elements of any floor plan. These can be created using various techniques within 3ds Max. One method is to create rectangular shapes and subtract them from the existing walls using Boolean operations. Another approach involves using pre-made door and window models from online libraries or creating custom models using the modeling tools within 3ds Max. Ensuring correct placement and sizing relative to wall dimensions is crucial for realism and accuracy. Parameters like height, width, and distance from the floor should be carefully considered.
4. Applying Materials and Textures
Adding materials and textures significantly enhances the visual appeal of the 3D floor plan. 3ds Max offers a vast library of materials with customizable properties, or users can import custom textures. Assign appropriate materials to different elements of the floor plan, such as walls, floors, and ceilings. Consider using realistic textures like wood, concrete, or tile to give the space a more lifelike appearance. The "Material Editor" allows for detailed adjustments of material properties, including color, reflectivity, and bump mapping. Experimenting with these parameters can greatly impact the final presentation.
5. Lighting the Scene
Proper lighting is essential to showcase the details of the 3D floor plan. Different lighting scenarios can be experimented with, such as daylight systems, interior lighting fixtures, or a combination of both. Utilize various light types available in 3ds Max, including "Target Spot," "Omni," and "IES" lights, to achieve the desired effect. Adjust light intensity, color, and shadows to create realistic ambiance within the virtual space. Baking light maps can enhance the realism of the scene by pre-calculating lighting interactions with the geometry.
6. Adding Furniture and Details
Populate the 3D floor plan with furniture and other details to provide context and scale. Use pre-made models from online libraries or create custom models using 3ds Max's modeling tools. Place furniture strategically according to the intended function of each space. Consider adding smaller details such as plants, rugs, and decorative items to enhance realism and create a more complete visualization. Careful arrangement of these elements can communicate the design intent effectively.
7. Camera Setup and Rendering
Finally, set up the camera to capture the desired views of the 3D floor plan. Experiment with different camera angles and perspectives to highlight specific features or create walkthrough sequences. Adjust camera settings such as focal length and aperture to control the field of view and depth of field. The "Render Setup" dialog box offers various rendering options to control image quality and output settings. Select an appropriate renderer and adjust parameters like resolution, anti-aliasing, and global illumination settings for optimal results. High-quality renderings can significantly enhance the presentation of the 3D floor plan.
Following these steps will enable the creation of a professional and detailed 3D floor plan in 3ds Max 2020, effective for visualization and communication of architectural designs.

How To Create A 3d Cutplan Realistic Floorplan Tutorial 3dfloorplan

How To Create A 3d Cutplan Realistic Floorplan Tutorial 3dfloorplan

How To Import Plan Into 3ds Max Solution Tutorial Covered Best Method

3ds Max Exterior House Design Part 1 Advance Modeling

3ds Max House Design Tutorial Part 2 Exterior In

Duplex House Design In 3ds Max With V Ray Complete Project From Autocad Plan To Final Rendering

How To Design A Exterior In 3ds Max Duplex House

Asadrazamidaz I Will Create 3d Floor Plan 2d Rendering For 10 On Fiverr Com

Make 3d Floor Plan Based On Sketch Or Matterport By Ducanhdo443 Fiverr

Lighting Floor Plan Scene 3d Max
Related Posts