How To Draw The Floor Plan Of A House
Creating a floor plan for a house is a fundamental skill for architects, interior designers, and even homeowners considering renovations. A floor plan provides a visual representation of a building’s layout, showcasing the arrangement of rooms, walls, doors, windows, and other essential features. This article outlines the process of drawing a floor plan, emphasizing accuracy, clarity, and adherence to standard conventions.
The process begins with gathering the necessary tools and materials. These typically include graph paper (preferably scaled), pencils of varying lead hardness, a ruler or architect's scale, an eraser, a measuring tape (preferably a laser distance measurer for larger spaces), and a compass or protractor. Optional tools include a set square, French curve, and computer-aided design (CAD) software. The choice between manual drafting and digital drawing depends on personal preference, budget, and the complexity of the project.
Before beginning the actual drawing, it is crucial to accurately measure the existing space. This involves measuring the length and width of each room, the thickness of walls, the dimensions of doors and windows, and the location of fixed elements like plumbing fixtures, electrical outlets, and heating vents. Accurate measurements are paramount to creating a reliable and usable floor plan. It is recommended to double-check all measurements and record them clearly to avoid errors later in the process. Create a rough sketch of the space and notate all measurements directly on the sketch.
The scale chosen for the floor plan is crucial. A common scale for residential floor plans is 1/4 inch equals 1 foot (1:48), but other scales such as 1/8 inch equals 1 foot (1:96) or even 1/2 inch equals 1 foot (1:24) can be used depending on the size of the building and the level of detail required. The scale should be clearly indicated on the floor plan. Using scaled graph paper simplifies the process of accurately representing the dimensions on the drawing.
Begin by drawing the exterior walls of the house. Using the measured dimensions and the chosen scale, carefully transfer the outline of the exterior walls onto the graph paper. Use a sharp pencil and a ruler to ensure straight lines and accurate proportions. Pay close attention to the thickness of the walls, representing them as double lines to distinguish them from interior partitions. The corners of the building should be square and precise.
Establishing the Walls and Structure
The foundation of any floor plan is the accurate representation of the walls defining the space. This includes both exterior walls, which form the perimeter of the building, and interior walls, which divide the space into individual rooms.
Once the exterior walls are drawn, proceed to draw the interior walls. Refer to the measurements taken earlier to accurately position the interior walls within the outline of the exterior walls. Maintain consistent wall thickness throughout the drawing. Use a lighter pencil lead to sketch the initial lines and then darken them once the placement is confirmed. Ensure that all walls are drawn perpendicular to each other unless the building design incorporates angled walls.
Bearing walls, which support the structure of the building, must be clearly identified on the floor plan. These walls are typically thicker than non-bearing walls and may require special consideration in terms of material and construction. Consult with a structural engineer if there is any uncertainty about the location or structural requirements of bearing walls.
During the wall drawing process, indicate any changes in wall thickness, such as those that occur at doorways or window openings. Also, note the presence of any structural elements within the walls, such as columns or beams. These elements play a critical role in the building's stability and must be accurately represented on the floor plan.
Accurately representing the walls and structure is paramount because any errors in this initial stage will propagate throughout the rest of the drawing, leading to inaccurate dimensions and a potentially unusable floor plan. Therefore, take ample time to ensure the walls are properly drawn and aligned before proceeding to the next step.
Adding Doors, Windows, and Architectural Features
After the walls are established, the next step is to add doors, windows, and other architectural features. These elements are essential for defining the functionality and aesthetics of the spaces within the house.
Doors are typically represented by a curved line indicating the direction of the door swing. The width of the door opening and the direction of the swing should be accurately depicted. Standard door sizes are usually 30 or 32 inches, but specific measurements should be taken to ensure accuracy. Indicate the door swing direction so it doesn't obstruct walking paths or furniture placement. Different symbols can be used to represent different types of doors, such as sliding doors or bi-fold doors.
Windows are represented by parallel lines indicating the window frame and a space between them representing the glass. The size and placement of the windows should be consistent with the actual measurements. Different symbols can be used to represent different types of windows, such as casement windows, double-hung windows, or bay windows. Note the height of the windowsill from the floor, especially for accessibility considerations.
Other architectural features to include are fireplaces, staircases, built-in cabinetry, and any other permanent elements that are part of the building's design. Fireplaces are typically represented by a rectangle with a chimney flue symbol. Staircases are represented by a series of parallel lines indicating the steps, with an arrow indicating the direction of ascent. Built-in cabinetry should be drawn to scale, showing the dimensions and configuration of the shelves and drawers.
The placement of these architectural features should be carefully considered in relation to the overall layout of the house. Doors and windows should be positioned to maximize natural light and ventilation. Staircases should be located in a central location for easy access to all levels of the house. Built-in cabinetry should be designed to provide ample storage space and enhance the functionality of the rooms.
The accuracy and clarity of these elements contribute significantly to the overall usefulness of the floor plan. By accurately representing the doors, windows, and architectural features, the floor plan becomes a valuable tool for planning renovations, arranging furniture, and visualizing the final result.
Annotating and Dimensioning the Floor Plan
Once the basic layout of the floor plan is complete, the final step is to add annotations and dimensions. These elements provide critical information about the size, function, and relationships between the different spaces within the house.
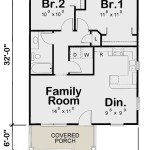
Room names should be clearly labeled within each room. Use a legible font and position the labels in a prominent location within each space. Common room names include living room, bedroom, kitchen, bathroom, and dining room. Additional labels can be added to identify specific features, such as a walk-in closet or a pantry.
Dimensions should be added to indicate the length and width of each room, as well as the overall dimensions of the house. Dimensions should be placed outside the walls and should be clearly readable. Use a consistent system for dimensioning, such as placing all dimensions on one side of the floor plan. In addition to room dimensions, also dimension the width of doorways, window openings, and other important features.
Indicate the location of electrical outlets, light fixtures, switches, and other electrical components. Use standard symbols to represent these elements. Plumbing fixtures, such as toilets, sinks, and showers, should also be clearly labeled. Indicate the location of water supply lines and drain lines. Heating and cooling vents should be represented by appropriate symbols. Indicate the direction of airflow for each vent.
A north arrow should be included on the floor plan to indicate the orientation of the house. This information is helpful for understanding the direction of sunlight and prevailing winds. A title block should be added to the floor plan, containing information such as the name of the project, the date of the drawing, the scale of the drawing, and the name of the person who created the drawing.
Careful annotation and dimensioning transform a simple drawing into a comprehensive and informative floor plan. By clearly labeling the rooms, adding dimensions, and indicating the location of electrical and plumbing fixtures, the floor plan becomes a valuable tool for architects, contractors, and homeowners alike. The final step is to review the floor plan carefully to ensure that all information is accurate and complete.
Throughout the entire process, maintaining consistent line weights is important. Thicker lines are typically used for exterior walls, while thinner lines are used for interior walls and other details. This helps to create a clear and visually appealing floor plan.
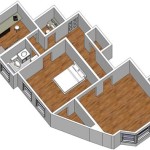
For those who prefer digital drawing, various CAD software programs are available. These programs offer a range of tools for creating accurate and detailed floor plans. They also allow for easy editing and revision. Popular CAD software options include AutoCAD, Revit, and SketchUp. Using CAD software also facilitates the creation of 3D models from the 2D floor plan.
Creating a floor plan requires attention to detail and a systematic approach. By following these steps, it is possible to create an accurate and informative floor plan that can be used for a variety of purposes, from planning renovations to designing a new house. The floor plan serves as a blueprint for bringing the design vision to life, ensuring accurate construction and efficient use of space.

How To Draw A Floor Plan The Home Depot

How To Draw A Floor Plan Live Home 3d

Floor Plan Creator And Designer Free Easy App

How To Draw Floor Plans With Floorplanner Com Young House Love

How To Manually Draft A Basic Floor Plan 11 Steps Instructables

Floor Plan Design Tutorial

How To Draw A Floor Plan The Simple 7 Step Guide For 2024
How To Draw A Floor Plan Beautiful Mess

Design Your Own House Floor Plans Roomsketcher

Draw Floor Plans In Half The Time Cedreo
Related Posts


