How to Create a Detailed Floor Plan Using AutoCAD: A Step-by-Step Guide
AutoCAD, a leading computer-aided design (CAD) software, is widely used in the architecture, engineering, and construction industries. Creating floor plans in AutoCAD allows for precise and professional results, making it an essential skill for professionals in these fields.
Creating a floor plan in AutoCAD involves a series of steps that require attention to detail and precision. Here's a comprehensive guide to assist you in creating detailed floor plans using AutoCAD:
1. Setting Up the Drawing Environment
To begin, open AutoCAD and create a new drawing. Set the appropriate drawing units and scales as per your project requirements. Establish the drawing limits to define the area where the floor plan will be drawn.
2. Drawing Walls and Boundaries
Start by drawing the walls using the "Line" command. Precisely specify the lengths and angles of each wall segment to ensure accuracy. Utilize the "Fillet" and "Chamfer" commands for rounded corners or angled intersections.
3. Inserting Doors and Windows
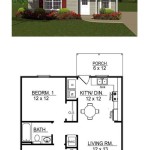
Once the walls are drawn, insert doors and windows using the corresponding blocks or by creating custom blocks. Specify the size, location, and swing direction of doors. For windows, indicate the type, dimensions, and placement.
4. Adding Interior Elements
Populate the floor plan with interior elements such as furniture, fixtures, and appliances. Use the "Insert" command to place pre-defined blocks or create custom blocks. Ensure proper scale and positioning of these elements.
5. Labeling and Dimensioning
Clearly label all rooms, spaces, and other features for easy identification. Use the "Text" command to add labels and the "Dimension" command to specify distances and measurements. Maintain consistency in text styles and dimension settings.
6. Creating Layers
Organize the drawing by using layers for different elements. For instance, create layers for walls, doors, windows, furniture, and dimensions. This allows for better control over visibility and editing later on.
7. Applying Materials and Finishes
If required, assign materials and finishes to various elements in the floor plan. Use the "Hatch" command to fill areas with patterns representing different materials. Consider using layers for materials to facilitate easy editing.
8. Exporting the Floor Plan
Once the floor plan is complete, export it in the desired format. Common export formats include DWG, PDF, and JPG. Choose the appropriate format based on the intended use and requirements of the project.
Creating floor plans in AutoCAD requires patience and attention to detail. By following the steps outlined in this guide, you can create accurate and professional floor plans that effectively communicate design intent and facilitate project execution.

Making A Simple Floor Plan In Autocad Part 1 Of 3

Basic Floor Plan Drafting In Autocad 7 Steps Instructables

How To Make House Floor Plan In Autocad Fantasticeng

Autocad 2d Basics Tutorial To Draw A Simple Floor Plan Fast And Efective Part 1

Autocad Simple Floor Plan For Beginners 1 Of 5

Making A Simple Floor Plan In Autocad Fantasticeng

Is Autocad The Best Floor Plan For Estate Agents Elements Property

How To Draw A Door In Autocad Floor Plan Backstudio Milan

Making A Simple Floor Plan In Autocad Must Know Time Saving Tricks Shortcuts Cad Intentions

30 X30 House Layout Plan Autocad Drawing Dwg File
Related Posts


