How To Draw a Floor Plan Of My House: Using Free Printable Templates
Creating a floor plan of a house is a fundamental step in various home-related projects, including renovations, interior design, real estate listings, and space planning. While professional architectural software offers advanced features, utilizing free printable templates provides a cost-effective and accessible alternative for homeowners seeking a basic, functional floor plan. This article outlines the process of drawing a floor plan using free printable templates, emphasizing the necessary steps, considerations, and techniques to achieve accurate and useful results.
Before embarking on the drawing process, assembling the necessary materials is crucial. This includes the free printable template, a measuring tape (preferably a laser measuring tool for increased accuracy), a pencil, an eraser, a ruler or straight edge, and paper for sketching preliminary measurements. The template should be selected based on the desired scale and level of detail. Some templates provide pre-formatted grids, while others offer blank canvases for more flexible design.
Selecting and Preparing Your Template
The initial step involves selecting an appropriate free printable floor plan template. Numerous websites offer downloadable templates in various formats, such as PDF or image files. Search terms like "free printable floor plan template," "architectural grid template," or "house plan grid paper" will yield a wide selection. When choosing a template, consider the scale that will be used. A common scale for residential floor plans is 1/4 inch equals 1 foot. This means that every 1/4 inch on the template represents 1 foot in the actual house. Select a template that accommodates the overall dimensions of the house being planned. Templates with larger grids are better suited for larger houses, while smaller grids are suitable for smaller spaces like single rooms or apartments.
Once a suitable template is downloaded and printed, it's important to ensure its accuracy. Check the printed scale against a known distance using a ruler. Discrepancies between the printed scale and the intended scale could arise due to printer settings. If the printed scale is inaccurate, adjust the printer settings (such as scaling options) and reprint the template. Preparation also includes having multiple copies of the template on hand to account for errors or revisions. Labeling each template iteration with a date or version number can aid in tracking progress.
Before starting the drawing process, consider the purpose of the floor plan. Is it for personal use in redesigning a room? Is it for showing to contractors? Is it for real estate listings? The intended use will influence the level of detail required. For instance, a floor plan intended for contractors may need to include specific measurements, material types, and locations of electrical outlets and plumbing fixtures. A floor plan for personal use could be less detailed and focused more on the overall layout and furniture arrangement.
Measuring and Recording Room Dimensions
Accurate measurement is the cornerstone of a useful floor plan. The first step is to measure the interior dimensions of each room. It is ideal to adopt a systematic approach, starting with one corner of the house and working methodically through each room. Measurements should be taken along the floor, from wall to wall, and recorded in feet and inches. Using a laser measuring tool can expedite this process and improve accuracy, particularly in large rooms or when measuring across obstacles.
When measuring, account for any irregularities in the walls, such as alcoves, bay windows, or built-in features. Record these irregularities carefully, as they will affect the placement of furniture and the overall flow of the room. Note the location and dimensions of doorways and windows. Measure the width of the door openings, the height of the doors, and the distance from the doorframe to the adjacent walls. Also, measure the height of the windows from the floor and the distance from the window frames to the walls. These measurements are crucial for accurate representation of the space.
In addition to room dimensions, measure the thickness of the walls. This information is essential for accurately portraying the overall footprint of the house. Wall thicknesses might vary depending on whether they are interior or exterior walls. Note the location of any structural elements, such as columns or load-bearing walls, as these cannot be easily altered during renovations.
It is highly recommended to sketch a rough layout of the house on a separate piece of paper as measurements are taken. This sketch serves as a visual aid and helps to ensure that all rooms and features are accounted for. The sketch need not be to scale but should accurately reflect the relative positions of walls, doors, and windows. Label each room and note the corresponding measurements. Double-check all measurements to minimize errors. It is better to remeasure than to redraw an entire floor plan due to inaccurate data.
Transferring Measurements to the Template
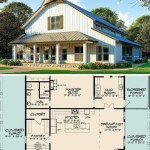
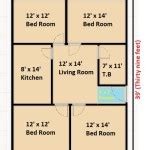
With the measurements recorded, the next step is to transfer them onto the free printable template. Using the chosen scale (e.g., 1/4 inch = 1 foot), convert the measurements into scaled dimensions. For example, if a wall is 12 feet long, it would be represented as 3 inches on a template using a 1/4 inch scale. Use a ruler or straight edge to draw the walls accurately on the template. Start with the exterior walls, establishing the overall footprint of the house. Then, draw the interior walls, using the measured distances from the exterior walls to position them correctly.
Pay close attention to the intersections of walls. Ensure that walls are drawn perpendicular to each other, unless the actual walls are angled. Use a pencil to draw the initial lines, as this allows for easy correction of errors. Double-check each line as it is drawn, comparing it to the recorded measurements. Accurately represent the thickness of the walls by drawing two parallel lines for each wall segment. The space between these lines represents the wall thickness.
Represent doorways and windows by creating openings in the walls. The width of the opening should correspond to the measured width of the doorway or window, scaled according to the chosen scale. Indicate the direction of door swing by drawing an arc from the hinge side of the door to the point where the door opens. This provides a clear visual representation of the door's movement and helps in planning furniture placement. Windows can be represented simply as openings in the wall, or with a small line indicating the window pane if more detail is desired.
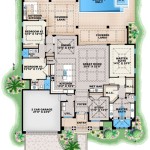
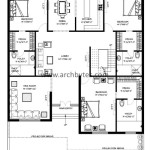
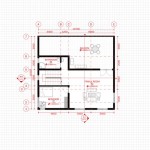
Label each room clearly with its name (e.g., kitchen, living room, bedroom). Add notations for any special features, such as built-in cabinets, fireplaces, or staircases. Indicate the location of electrical outlets, switches, and plumbing fixtures if they are important for the intended use of the floor plan. A simple system of symbols can be used to represent these features. Create a legend accompanying the floor plan to explain the symbols used. Consider adding directional arrows to indicate the north direction. This can be useful for understanding the orientation of the house and its exposure to sunlight.
Once the initial floor plan is drawn, review it carefully for accuracy and completeness. Compare the floor plan to the rough sketch and the recorded measurements. Make any necessary corrections or adjustments. Use an eraser to remove any unnecessary lines or markings. Once satisfied with the accuracy of the floor plan, consider using a pen or marker to outline the walls and features. This will create a cleaner and more professional-looking floor plan. Consider scanning the completed floor plan and saving it digitally. This allows for easy sharing and editing.
Drawing a floor plan using free printable templates is a practical and cost-effective way to visualize the layout of a house. While it requires careful measurement and attention to detail, the resulting floor plan can be a valuable tool for various home-related projects. Following these detailed steps ensures an accurate and useful representation of the house layout.

Draw Floor Plans Try Smartdraw Free And Easily More

Floor Plan Templates Draw Plans Easily With

Make Your Own Blueprint How To Draw Floor Plans

Create And Visualize House Plans In Minutes Roomsketcher

How To Draw A Floor Plan Live Home 3d

Free Floor Plan Creator Design 2d 3d Layouts Easily

How To Draw Blueprints For A House With Pictures Wikihow

How To Draw A Floor Plan The Home Depot

How To Draw Floor Plans Guide Create In 2d And 3d

How To Draw Blueprints For A House With Pictures Wikihow
Related Posts

