How To Draw a Floor Plan in AutoCAD 2007
AutoCAD 2007 remains a widely utilized Computer-Aided Design (CAD) software for creating precise and detailed floor plans. While newer versions offer enhanced features, AutoCAD 2007 provides a robust set of tools for designing residential, commercial, and industrial spaces. This article outlines a systematic approach to drawing a floor plan using AutoCAD 2007, covering essential commands and best practices for accurate and efficient design.
Prior to initiating the drawing process, it's crucial to gather all necessary information. This includes the building's dimensions, wall thicknesses, door and window sizes and locations, plumbing fixture specifications, and any other relevant architectural details. Having this information readily available will streamline the drawing process and minimize errors.
Setting up the AutoCAD environment correctly is paramount for accurate drafting. This involves configuring units, setting limits, and establishing layers. These initial steps ensure that the floor plan is drawn to scale and organized effectively.
1. Setting Up the AutoCAD Environment
The initial setup involves configuring the working environment to meet the project's specific requirements. This includes defining units of measurement, establishing drawing limits, and creating layers for different elements of the floor plan.
A. Units Configuration: The first step is to set the units in AutoCAD. This is done using the 'UNITS' command. Type 'UNITS' in the command line and press Enter. A Drawing Units dialog box will appear. In this dialog box, choose the appropriate units of measurement, such as architectural (feet and inches), decimal (meters or millimeters), or engineering. Also, set the precision level to the desired accuracy. For architectural drawings, a precision of 1/16" or 1/32" is generally sufficient. Click 'OK' to save the settings.
B. Drawing Limits: Next, set the drawing limits. This defines the virtual area within AutoCAD where the drawing will be created. Use the 'LIMITS' command. Type 'LIMITS' in the command line and press Enter. AutoCAD will prompt you to specify the lower-left corner. Enter '0,0' (without the quotes) and press Enter. Then, AutoCAD will prompt you to specify the upper-right corner. The values for the upper-right corner depend on the expected size of the floor plan. If the floor plan is relatively small (e.g., a small apartment), a value of '50,50' (assuming units are in feet) might be sufficient. For larger floor plans, a larger value, such as '100,100' or '200,200', may be necessary. After setting the limits, use the 'ZOOM' command and specify 'ALL' to ensure the entire drawing area is visible. Type 'ZOOM' and press Enter, then type 'A' and press Enter.
C. Layer Creation: Layers are essential for organizing and managing different elements of the floor plan. Create layers for walls, doors, windows, furniture, dimensions, and any other distinct component. To create layers, use the 'LAYER' command (or type 'LA' and press Enter). The Layer Properties Manager will appear. Click the 'New Layer' button (usually represented by a sun icon) to create a new layer. Assign a descriptive name to each layer (e.g., 'Walls', 'Doors', 'Windows'). Set the color, linetype, and lineweight for each layer as appropriate. For example, the 'Walls' layer might be set to a dark gray color with a continuous linetype and a heavier lineweight compared to the 'Dimensions' layer. Ensure that the 'Walls' layer is active before starting to draw the walls.
By properly configuring these settings, the drawing environment is optimized for creating an accurate and organized floor plan. This preliminary step is critical for ensuring efficiency and preventing errors during the drawing process.
2. Drawing the Walls
Once the environment is configured, the next step is to draw the walls, which form the basic structure of the floor plan. This involves using the 'LINE' or 'POLYLINE' commands to accurately represent the exterior and interior walls according to the specified dimensions.
A. Using the LINE Command: The 'LINE' command is a fundamental tool for creating straight line segments. Type 'LINE' (or 'L') in the command line and press Enter. AutoCAD will prompt you to specify the first point. Click on the drawing area to define the starting point of the first wall. Then, specify the second point by either clicking on the drawing area or entering the coordinates in the command line. To ensure the walls are drawn horizontally or vertically, activate the 'ORTHO' mode (usually by pressing the 'F8' key). This will restrict the cursor movement to only 0, 90, 180, and 270 degrees. Enter the length of the wall in the command line and press Enter. Repeat this process for all wall segments, connecting them to form the overall shape of the building. To close the wall outline, either click on the starting point or type 'C' in the command line and press Enter.
B. Using the POLYLINE Command: The 'POLYLINE' command is similar to the 'LINE' command, but it creates a single, continuous object instead of individual line segments. Type 'POLYLINE' (or 'PL') in the command line and press Enter. Follow the same steps as with the 'LINE' command to define the starting point, specify the length and direction of each wall segment, and close the outline. The advantage of using the 'POLYLINE' command is that the entire wall outline is treated as a single entity, making it easier to select and modify later.
C. Wall Thickness: After drawing the wall outlines, use the 'OFFSET' command to create the wall thickness. Type 'OFFSET' (or 'O') in the command line and press Enter. AutoCAD will prompt you to specify the offset distance, which represents the wall thickness. Enter the desired wall thickness (e.g., 0.5 feet for a 6-inch wall) and press Enter. Then, select the wall outline (either a single line or a polyline) and click inside or outside the outline to specify the direction of the offset. Repeat this process for all walls. To clean up the intersections of the wall lines, use the 'FILLET' or 'TRIM' command. The 'FILLET' command (type 'F' and press Enter) can be used to create rounded corners, while the 'TRIM' command (type 'TR' and press Enter) can be used to remove unwanted portions of the lines.
Accurately drawing the walls is the most important step in creating a floor plan. Ensuring the walls are to scale and correctly positioned is crucial for the overall accuracy of the design.
3. Adding Doors and Windows
Once the walls are drawn, the next step is to add doors and windows. This involves creating openings in the walls and inserting representations of doors and windows in their designated locations.
A. Creating Openings: To create openings for doors and windows, use the 'TRIM' command. First, draw temporary lines to indicate the width of the door or window opening. These lines should extend beyond the wall lines. Then, type 'TR' in the command line and press Enter twice. Select the wall lines that need to be trimmed and then select the temporary lines. The portions of the wall lines between the temporary lines will be removed, creating the opening. Erase the temporary lines after trimming.
B. Inserting Doors: Doors can be represented in various ways, depending on the level of detail required. A simple representation might consist of an arc representing the door swing and a line representing the thickness of the door. Alternatively, you can create a more detailed representation of a door with frame and hardware. Create a separate layer for doors. Draw the door representation on this layer. To insert the door into the opening, use the 'MOVE' command to position the door correctly. The 'ROTATE' command can be used to rotate the door to the desired angle. If you have multiple doors of the same size and style, use the 'COPY' command to create copies of the existing door and place them in the other openings.
C. Inserting Windows: Similar to doors, windows can also be represented in different ways. A simple representation might consist of two or three parallel lines indicating the window frame and panes. Create a separate layer for windows. Draw the window representation on this layer. To insert the window into the opening, use the 'MOVE' command to position the window correctly. Ensure the window is centered within the opening. If you have multiple windows of the same size and style, use the 'COPY' command to create copies of the existing window and place them in the other openings.
The accurate placement and representation of doors and windows are essential for the functionality and aesthetic appeal of the floor plan. Consider the swing direction of doors and the placement of windows to ensure proper ventilation and natural light.
Following the steps outlined above, one can construct a detailed and accurate floor plan using AutoCAD 2007. Remember that practice and familiarity with the software's commands contribute significantly to efficiency and precision. Continuously explore and experiment with different tools and techniques to enhance drawing skills.
Additional refinements can be added to the floor plan to increase its readability and informational value. This can involve adding furniture layouts, dimensioning the spaces, and including text annotations to label different rooms and features.
Furniture layouts are typically created using blocks, which are pre-defined symbols representing different furniture items. Creating blocks for frequently used furniture elements can save time and ensure consistency throughout the drawing. Dimensioning involves adding measurements to the floor plan to indicate the size and location of walls, doors, windows, and other features. Dimensions should be clear, concise, and accurately reflect the dimensions of the building. Text annotations can be used to label different rooms, features, and materials. Use a consistent font and text size to maintain clarity and readability.

Autocad 2007 Floor Plan Tutorial

Autocad 2007 Tutorial Floor Plan

Solved Draw This With Autocad 2007 And Explain Properly The Chegg Com

Autocad Tutorial 2007 House Plan Design 3 Bedroom

Autocad 2007 Tutorial Complete House Plan In 2d

Autocad 2007 Tutorial Complete House Plan In 2d

How To Draw 2d House Map In Autocad 2007 Part 1 Computer Aided Design Practical Week 6

Part 1 Ground Floor Plan Grid In Autocad By Abel M

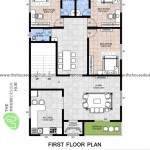
First Floor Plan Autocad Tutorial For Beginner 1st Part 2

First Floor Plan Autocad Tutorial For Beginner 1st Part 2
Related Posts