How to Draw a Simple Floor Plan in AutoCAD
AutoCAD is a powerful software for creating 2D and 3D designs, including floor plans. Whether you're an architect, interior designer, or simply someone who wants to plan your own home, AutoCAD can help you create accurate and professional-looking floor plans. In this tutorial, we'll go through the steps of how to draw a simple floor plan in AutoCAD. We'll cover the basics of setting up your drawing, creating walls, adding doors and windows, and dimensioning your plan.1. Setting Up Your Drawing
The first step is to set up your drawing. This includes creating a new drawing file, setting the units, and setting the scale. To create a new drawing file, click on the "Start" menu and type "AutoCAD." Click on the AutoCAD icon to open the software. Once AutoCAD is open, click on the "File" menu and select "New." This will create a new drawing file. Next, you need to set the units for your drawing. The units can be set to inches, feet, meters, or any other unit of measurement. To set the units, click on the "Format" menu and select "Units." In the "Units" dialog box, select the desired units from the "Drawing Units" drop-down menu. You can also set the precision of the units in the "Precision" field. Finally, you need to set the scale for your drawing. The scale determines how large or small your drawing will be when it is printed. To set the scale, click on the "View" menu and select "Zoom." In the "Zoom" dialog box, select the "Scale" tab. In the "Scale" field, enter the desired scale. The scale is expressed as a ratio of the drawing size to the actual size. For example, a scale of 1:100 means that 1 unit in the drawing is equal to 100 units in real life.2. Creating Walls
The next step is to create the walls for your floor plan. Walls can be created using the "Line" or "Polyline" commands. To create a wall using the "Line" command, click on the "Line" icon on the "Draw" toolbar. Move the cursor to the starting point of the wall and click. Move the cursor to the end point of the wall and click again. To create a wall using the "Polyline" command, click on the "Polyline" icon on the "Draw" toolbar. Move the cursor to the starting point of the wall and click. Continue clicking to define the vertices of the wall. Double-click to end the polyline. Once you have created the walls, you can adjust their thickness and height. To adjust the thickness, select the wall and enter the desired thickness in the "Thickness" field on the "Properties" palette. To adjust the height, select the wall and enter the desired height in the "Height" field on the "Properties" palette.3. Adding Doors and Windows
The next step is to add doors and windows to your floor plan. Doors and windows can be created using the "Insert" menu. To insert a door, click on the "Insert" menu and select "Block." In the "Insert Block" dialog box, navigate to the "Architectural" folder and select the desired door block. Click on the "OK" button to insert the door into your drawing. To insert a window, click on the "Insert" menu and select "Block." In the "Insert Block" dialog box, navigate to the "Architectural" folder and select the desired window block. Click on the "OK" button to insert the window into your drawing. Once you have inserted the doors and windows, you can adjust their size and location. To adjust the size, select the door or window and enter the desired size in the "Width" and "Height" fields on the "Properties" palette. To adjust the location, select the door or window and move it to the desired location.4. Dimensioning Your Plan
The final step is to dimension your floor plan. Dimensioning your plan will help you to accurately measure the size and shape of your space. To dimension your plan, click on the "Dimension" tab on the "Annotate" panel. Select the desired dimension type from the "Dimension" drop-down menu. Move the cursor to the starting point of the dimension line and click. Move the cursor to the end point of the dimension line and click. The dimension will be automatically created. You can adjust the appearance of the dimension by selecting it and modifying the properties on the "Properties" palette. You can change the text size, the arrowhead style, and the extension line length.Conclusion
Drawing a simple floor plan in AutoCAD is a relatively easy process. By following the steps in this tutorial, you can create an accurate and professional-looking floor plan that can be used for a variety of purposes.
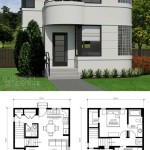
Autocad 2d Basics Tutorial To Draw A Simple Floor Plan Fast And Efective Part 1

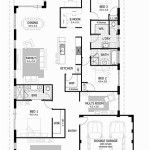
How To Draw Floor Plans In Autocad Edrawmax

Autocad 2d Basics Tutorial To Draw A Simple Floor Plan Fast And Efective Part 1

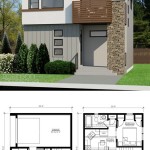
Autocad Simple Floor Plan For Beginners 1 Of 5

How To Draw Floor Plans In Autocad Edrawmax

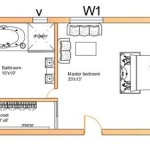
Making A Simple Floor Plan In Autocad Part 2 Of 3

How To Draw Floor Plans In Autocad Edrawmax

Autocad Tutorial Draw A House Floor Plan Free Cad Blocks In Dwg File Format

Autocad 2d Basics Tutorial To Draw A Simple Floor Plan Fast And Efective Part 1

Autocad Drawing And Coohom Design 3d Fast Rendering Blog
Related Posts