How to Create a Floor Plan of Your Home
Creating a floor plan of a home provides a visual representation of the property's layout, dimensions, and features. This plan serves multiple purposes, from facilitating interior design projects and renovations to aiding in emergency planning and property valuation. Several methods exist for generating these plans, ranging from traditional manual sketching to utilizing sophisticated digital software.
This article will explore the process of creating a floor plan, outlining the necessary steps, tools, and considerations required for accurate and effective representation. Regardless of the chosen method, careful attention to detail and adherence to consistent measurement practices are paramount to producing a useful and informative floor plan.
Gathering Necessary Tools and Materials
Before embarking on the floor plan creation process, assembling the appropriate tools and materials is essential. The selection of these items depends largely on the desired level of precision and the chosen methodology. Manual methods require a different set of tools compared to digital approaches.
For manual floor plans, a measuring tape (preferably a long one, 25 feet or more), a pencil, an eraser, graph paper or plain paper, a straight edge or ruler, and a protractor (optional, for measuring angles) are necessary. The measuring tape should be of good quality and have clearly marked increments. The pencil should be a mechanical pencil or a sharp pencil to ensure accurate lines. Graph paper provides a pre-defined grid, simplifying the process of drawing to scale. A straight edge will help in creating straight lines. A notebook for recording measurements is also helpful.
For digital floor plans, a computer or tablet with floor planning software, a laser distance measurer, and a printer is required. A laser distance measurer significantly speeds up the measuring process and improves accuracy compared to a traditional measuring tape. Floor planning software options range from free online tools to professional-grade CAD (Computer-Aided Design) programs. A printer is needed to produce a physical copy of the completed floor plan.
Irrespective of the method chosen, ensuring that all tools are in good working order and readily accessible will streamline the floor plan creation process.
Measuring the Interior Space
Accurate measurements are the cornerstone of a reliable floor plan. Consistency and precision in measurement taking are crucial. Before beginning, it is advisable to create a rough sketch of the home’s layout to serve as a guide for recording measurements.
The process begins by measuring the exterior walls of each room. It is recommended to measure along the floor, where the wall meets the floor, ensuring that no baseboards or other obstructions interfere with the measurement. Measure each wall multiple times to ensure accuracy. Inconsistencies should be remeasured to identify and correct errors.
Next, measure the interior walls, doorways, and windows. For doorways, measure the width of the opening and the distance from the adjacent walls. For windows, measure the width and height of the window opening, as well as the distance from the floor and adjacent walls. Record the dimensions of any built-in features, such as cabinets, fireplaces, or closets.
When measuring rooms with irregular shapes, such as those with angled walls or curves, divide the room into smaller, more manageable sections. Measure each section separately and combine the measurements to determine the overall dimensions of the room. For angled walls, a protractor can be used to measure the angle, though approximate measurements are often sufficient for basic floor plans. For curved walls, measure the chord length (the straight-line distance between the endpoints of the curve) and the maximum perpendicular distance from the chord to the curve. These measurements can then be used to approximate the curve on the floor plan.
It is essential to maintain consistent units of measurement throughout the process, whether using feet and inches or meters and centimeters. Avoid mixing units, as this can lead to significant errors in the final floor plan. All measurements should be recorded clearly and legibly in the notebook or directly into the floor planning software.
Finally, double-check all measurements to ensure accuracy. Walk through the house again, comparing the recorded measurements with the actual dimensions of each room. Any discrepancies should be investigated and corrected immediately.
Creating the Floor Plan: Manual and Digital Methods
Once the measurements have been collected, the next step is to translate them into a visual representation. This can be accomplished using either manual drafting techniques or digital floor planning software.
Manual Drafting: With a manual approach, begin by selecting a suitable scale for the floor plan. The scale determines the relationship between the dimensions on the plan and the actual dimensions of the house. A common scale for residential floor plans is 1/4 inch equals 1 foot (1:48). This means that every 1/4 inch on the plan represents 1 foot in reality. Choose a scale that allows the entire floor plan to fit comfortably on the available paper.
Using the graph paper and straight edge, draw the exterior walls of the house to scale. Start with the longest wall and work around the perimeter, carefully plotting each measurement. Use the recorded measurements to accurately position doorways, windows, and interior walls. Pay close attention to the thickness of the walls, representing them with double lines to distinguish them from other features.
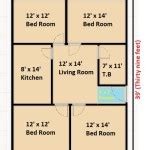
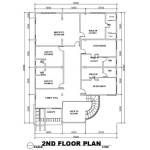
Add details such as doors, windows, stairs, and built-in features. Use standard symbols to represent these elements, ensuring consistency throughout the floor plan. For example, a door can be represented as an arc swinging from the door jamb, indicating the direction of the door's swing. Windows can be represented as parallel lines within the wall thickness. Stairs should be clearly indicated with arrows showing the direction of ascent or descent, along with the number of risers.
Label each room and feature clearly, using a consistent font and size. Include dimensions for each room and wall, indicating the length and width. Add notes to clarify any ambiguous or unusual features. For example, note the ceiling height in rooms with vaulted ceilings or the location of electrical outlets and plumbing fixtures.
Once the floor plan is complete, review it carefully for accuracy and clarity. Make any necessary corrections or revisions. The final floor plan should be a clear and accurate representation of the house's layout, dimensions, and features.
Digital Floor Planning: Digital floor planning software offers a more efficient and precise method for creating floor plans. These programs provide a user-friendly interface with tools for drawing walls, inserting doors and windows, adding furniture and fixtures, and generating 3D models.
Begin by selecting a floor planning software program that meets the specific needs and budget. Numerous options are available, ranging from free online tools to professional-grade CAD software. Some popular programs include SketchUp, AutoCAD, RoomSketcher, and Planner 5D.
Once the software is installed and running, begin by creating a new project and setting the appropriate units of measurement. Enter the dimensions of the exterior walls, using the laser distance measurer to ensure accuracy. The software will automatically draw the walls to scale, creating the basic outline of the house.
Insert doors and windows into the walls, using the software's object library or creating custom elements. Specify the dimensions, position, and type of each door and window. Most floor planning software allows users to easily adjust these parameters using drag-and-drop tools or by entering numerical values.
Add interior walls, stairs, and built-in features, following the recorded measurements. The software will automatically snap walls together and provide tools for aligning and positioning elements accurately. Use the software's object library to add furniture, appliances, and other fixtures to the floor plan. These objects can be scaled, rotated, and positioned to create a realistic representation of the interior space.
Label each room and feature clearly, using the software's text tools. Add dimensions to each room and wall, indicating the length and width. The software may automatically generate dimensions based on the drawn geometry. Add notes to clarify any ambiguous or unusual features.
Once the floor plan is complete, use the software's 3D modeling capabilities to create a three-dimensional representation of the house. This allows users to visualize the space from different angles and gain a better understanding of the overall layout and design. The 3D model can be exported as an image or video for presentation purposes.
Finally, save the floor plan in a suitable file format, such as DWG, DXF, or PDF. These formats can be easily shared with architects, contractors, and other professionals. Print a physical copy of the floor plan for reference or use during construction or renovation projects.
Regardless of the method chosen, creating a floor plan requires careful attention to detail and adherence to consistent measurement practices. The resulting floor plan should be a clear, accurate, and informative representation of the house's layout, dimensions, and features.

Floor Plan Creator And Designer Free Easy App

Floor Plans Learn How To Design And Plan

House Plans How To Design Your Home Plan

House Plans How To Design Your Home Plan

House Plans How To Design Your Home Plan

How To Create A Floor Plan And Furniture Layout

House Plans How To Design Your Home Plan

Floor Plan Design Tutorial

Create Floor Plan Architecture Sink

Draw Floor Plans In Half The Time Cedreo
Related Posts


