How to Calculate Carpet Area from a Floor Plan in an AutoCAD Drawing
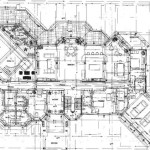
Accurate carpet area calculation is crucial for various purposes, from estimating material costs to planning interior design layouts. While manual measurement can be tedious and prone to errors, AutoCAD offers tools that streamline this process, allowing you to swiftly and precisely determine the carpet area from a floor plan drawing. This article will guide you through the steps involved in calculating carpet area in AutoCAD, emphasizing the key functionalities that simplify this task.
1. Prepare the Floor Plan for Calculation
Before embarking on the carpet area calculation, ensuring your AutoCAD drawing is ready is essential. This involves taking the following steps:
a. Create a Clean Floor Plan: Begin by importing your floor plan into AutoCAD or creating a new drawing. Ensure the drawing is clean and free of unnecessary elements like dimensions, notes, or symbols that might interfere with the area calculation. If required, utilize the "Erase" tool in AutoCAD to remove these extraneous elements.
b. Verify the Floor Plan's Scale: Accurately calculating the carpet area relies on a precise scale for your drawing. Double-check the drawing's scale by examining the properties of the floor plan or utilizing AutoCAD's "Scale" command. If the scale is incorrect, adjust it accordingly.
c. Define Carpet Area Boundaries: Identify the specific areas you want to calculate the carpet area for. This might involve selecting specific rooms, the entire building, or specific portions of the floor plan. Use AutoCAD's selection tools to highlight these areas. If necessary, create separate layers or groups for the regions you want to calculate separately.
2. Utilize AutoCAD's Area Calculation Tools
AutoCAD provides intuitive tools that simplify the process of calculating the carpet area of your floor plan. The most commonly used methods include:
a. The "Area" Command: This command is a fundamental tool for calculating areas in AutoCAD. To use it, select the "Area" command from the "Home" tab or by typing "AREA" in the command line. Then, click on the boundaries of the area you wish to measure. AutoCAD will automatically calculate the area and display it in the command line and as a dimension in the drawing.
b. The "Region" Command: The "Region" command is particularly useful for calculating complex areas with multiple internal or external boundaries. To use it, select the "Region" command from the "Home" tab. Then, click on the boundaries of the area you want to measure. Ensure all the boundaries are closed, either by clicking on the starting point or by using the "Close" option. Afterward, use the "Area" command to calculate the total area of the region.
c. The "Boundary" Command: If your floor plan contains a large number of lines or shapes, the "Boundary" command can be valuable. This command automatically creates a closed polygon from selected lines, making it easier to calculate the enclosed area. Select the "Boundary" command and then select all the lines that define the area you wish to measure. AutoCAD will create a boundary object, and you can then use the "Area" command to calculate its area.
3. Adjust for Exclusions and Deductions
In many cases, you might need to account for exclusions or deductions when calculating the carpet area. These can include areas occupied by furniture, fixtures, or other non-carpeted portions of the floor plan. AutoCAD allows you to adjust for these exclusions by implementing the following strategies:
a. Subtract Exclusions: If you have defined specific exclusion areas within your floor plan, use the "Subtract" tool in AutoCAD. Select the area where you want to deduct the exclusion and then select the exclusion area. AutoCAD will subtract the exclusion area from the original area, providing the accurate carpet area.
b. Use Boolean Operations: For advanced manipulation of areas, use Boolean operations like "Union," "Intersect," and "Subtract." These operations allow you to combine or subtract different areas based on their geometric relationships, resulting in a precise calculation of the carpet area after accounting for any exclusions or deductions.
c. Modify the Drawing: If the exclusions or deductions are complex or numerous, consider directly modifying the drawing to reflect the carpeted area. Delete or isolate the portions of the floor plan not meant for carpeting. This ensures the area calculation directly reflects the actual carpet area.

How To Calculate Carpet Area In Autocad Lecture 8

How To Calculate The Area Of A House Plan In Autocad 30sec

2 Bhk Floor Plan In 800 Sqft Carpet Area Autocad 30 11 X25 Building 6

Calculating Floor Area In Autocad

How To Calculate Built Up Are Carpet Area In Autocad By Civilguruji
Residential Architect How To Create A Floor Plan Thomas Soltren Skillshare

Built Up Area Calculation Of Ground Floor Plan In Detail Autocad Drawing Cad File Dwg Cadbull

Brief About Plot Area Built Up And Carpet

Making A Simple Floor Plan In Autocad Part 1 Of 3

How To Dimension Areas In Technical Drawings Annotator
Related Posts

