Are you looking to build a home for your furry friends? Bat houses are a great way to give bats a safe and comfortable place to live. Not only that, but they can also help to keep your home and yard free of pesky bugs and pests. With a few easy steps, you can easily build a bat house of your own!
Step One: Gather Your Materials
Before you can start building your bat house, you’ll need to gather the necessary materials. Your list should include:
- Wood (plywood, cedar, etc.)
- Nails or screws
- Hammer or drill
- Screwdriver
- Paint or sealant
Step Two: Cut and Assemble
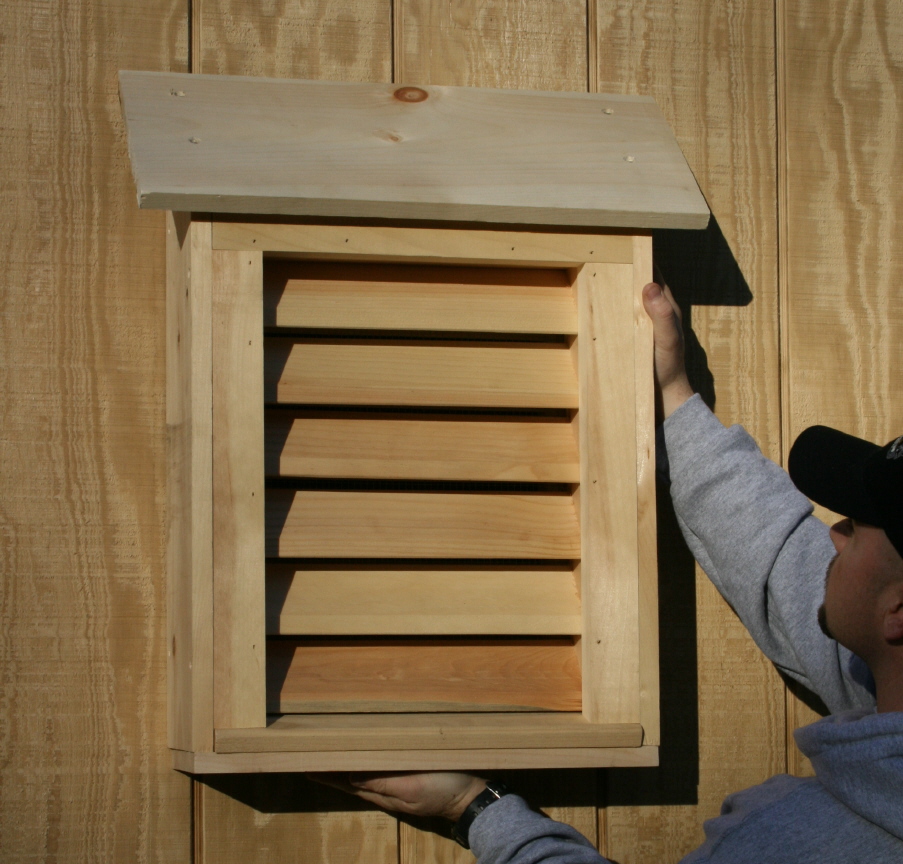
Once you have all of your materials, you can start cutting and assembling your bat house. Start by cutting the wood according to your bat house plans. You can typically find these plans online, or you can design your own. Once you have the pieces cut, use nails or screws to assemble the house. Make sure to leave gaps between the boards for air circulation.
Step Three: Paint and Seal
Now that your bat house is assembled, it’s time to paint and seal it. This will help to protect your house from the elements and keep it looking great for years to come. Start by painting the outside of the house with a weather-resistant paint. Once the paint is dry, you can use a sealant to make sure your house is airtight.
Step Four: Hang and Enjoy
The last step is to simply hang your bat house and enjoy! Make sure to hang it in a spot that is out of direct sunlight and away from any predators. You can also add a few pieces of wood around the house to create a perch for the bats. With your bat house complete, you can now enjoy the benefits of having bats around your home!


Related Posts