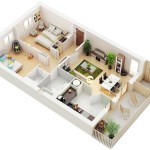
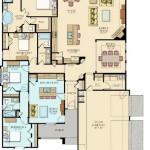
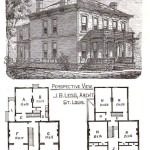
How To Draw a Simple House Plan
Creating a simple house plan is a valuable skill, whether for planning a future home, visualizing a renovation project, or simply exploring design ideas. This article provides a step-by-step guide to drawing a basic house plan, accessible even to individuals with no prior drafting experience. The process involves understanding the essential elements, gathering necessary tools, and following a systematic approach.
1. Define the Scope and Gather Materials
Before beginning the drawing process, it is crucial to define the scope of the house plan. Determine the purpose – is it for conceptualization, permit applications, or contractor estimations? This will influence the level of detail required. For a simple plan, focus on the overall layout, room dimensions, and basic features. Gathering the necessary materials is equally important. These include:
- Graph paper: Provides a structured grid for accurate scaling and measurements.
- Pencils: Mechanical pencils with various lead thicknesses allow for precise lines and adjustments.
- Eraser: A good quality eraser is essential for corrections and refinements.
- Ruler or Scale: Used for drawing straight lines and measuring distances accurately.
- Templates (optional): Shapes like circles and ovals can be easily drawn with templates.
2. Start with the Outer Walls
Begin the drawing process by sketching the outer walls of the house. Use the graph paper's grid to ensure accurate proportions and straight lines. Choose a suitable scale, such as 1 square representing 1 foot, depending on the size of the house and the paper size. Mark the corners of the house and connect them with straight lines using a ruler. This creates the basic outline of the structure. Consider the desired shape of the house—rectangular, L-shaped, or U-shaped—and draw accordingly.
Once the outer walls are drawn, mark the locations of doors and windows. Use standard sizes for these elements, or measure existing ones if creating a plan for a renovation. Represent doors with a slight opening in the wall line and windows with double lines. Label each opening to clearly identify its purpose.
3. Add Interior Walls and Rooms
With the exterior walls defined, proceed to draw the interior walls to create individual rooms. Again, utilize the graph paper grid and ruler to ensure straight lines and accurate dimensions. Consider the desired size and function of each room. Bedrooms, bathrooms, kitchen, living room, and dining room are common elements in a house plan. Label each room accordingly for clarity.
When drawing interior walls, ensure they connect seamlessly with the exterior walls. Mark doorways within the interior walls, indicating the flow between rooms. Pay attention to the placement of windows within each room, considering factors like natural light and ventilation.
4. Incorporate Fixtures and Appliances
After defining the rooms, add the necessary fixtures and appliances. In the kitchen, indicate the location of the sink, stove, refrigerator, and dishwasher. In bathrooms, mark the positions of the toilet, sink, and shower or bathtub. These elements can be represented by simple shapes or symbols. Maintain consistency in scale and representation throughout the plan.
Include other essential fixtures like staircases, fireplaces, and built-in furniture. Use clear and consistent symbols to represent these items. For example, a staircase can be depicted with a series of parallel lines and arrows indicating the direction of ascent.
5. Add Dimensions and Labels
Once all the elements are placed within the drawing, add dimensions to each room and wall. Write the measurements clearly using the chosen scale. This ensures accurate representation of the spatial layout and is crucial for construction or renovation purposes. Label each room and area clearly with its intended function, such as "Master Bedroom," "Kitchen," or "Living Room."
Label the doors and windows with their respective types and dimensions. For example, indicate whether a door is a single door, double door, or sliding door. Specify the width and height of each window. This detailed labeling provides comprehensive information for anyone interpreting the plan.
6. Refine and Finalize
After adding dimensions and labels, review the entire drawing for any errors or omissions. Check the alignment of walls, accuracy of measurements, and clarity of labels. Make any necessary corrections or refinements using the eraser and pencil. Once satisfied with the accuracy and completeness of the plan, darken the lines with a darker pencil or pen to create a final, clear representation of the house plan.
Consider creating multiple copies of the finalized plan for different purposes. One copy can serve as a master drawing, while others can be used for annotations, modifications, or sharing with contractors and other stakeholders.

Draw Floor Plans With The Roomsketcher App

How To Draw Blueprints For A House With Pictures Wikihow

Floor Plan Easy Example Simple Plans Design Hotel

How To Draw A Floor Plan The Simple 7 Step Guide For 2024

Blender For Noobs 10 How To Create A Simple Floorplan In

Small House Design 2024001 Pinoy Eplans Floor Plans

Draw Floor Plans Try Smartdraw Free And Easily More

Ready To Use Sample Floor Plan Drawings Templates Easy Blue Print Floorplan Ezblueprint Com

Draw Floor Plans In Half The Time Cedreo

How To Draw A Floor Plan Live Home 3d
Related Posts


