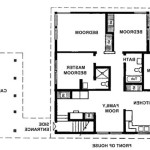
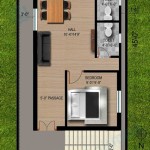
How to Draw Dimensions on a Floor Plan in AutoCAD
Creating accurate and informative floor plans is essential for architects, interior designers, and contractors. Dimensions are a crucial aspect of floor plans, as they convey the measurements and relationships between various elements within a space. AutoCAD, a widely used computer-aided design (CAD) software, offers a range of tools and commands that make it easy to draw precise dimensions on floor plans.
In this guide, we will explore the essential aspects of drawing dimensions on a floor plan using AutoCAD. We will cover the types of dimensions, the measurement units, and the step-by-step process of creating and modifying dimensions.
Types of Dimensions
AutoCAD allows you to create different types of dimensions, each suitable for specific situations. The most common types of dimensions include:
- Linear dimensions: Measure the distance between two points along a straight line.
- Aligned dimensions: Measure the distance between two points parallel to a specified reference line.
- Radial dimensions: Measure the distance from a point to a circle or arc.
- Angular dimensions: Measure the angle between two lines or surfaces.
Measurement Units
Before creating dimensions, you need to specify the measurement units you want to use. AutoCAD supports various units, including inches, feet, millimeters, and meters. To set the measurement units:
- Click the "Units" button in the status bar.
- Choose the desired unit system from the drop-down list.
Drawing Dimensions
To draw a dimension in AutoCAD, follow these steps:
- Select the "Dimension" command from the "Annotate" tab.
- Choose the type of dimension you want to create.
- Select the objects or points to be dimensioned.
- Specify additional parameters, such as the text location, line style, and arrowhead style.
- Click to place the dimension on the drawing.
Modifying Dimensions
Once a dimension is created, you can modify its properties if necessary. To modify a dimension, follow these steps:
- Select the dimension you want to modify.
- Right-click and select "Properties" from the context menu.
- Make the desired changes in the Dimension Properties dialog box.
- Click "OK" to save the changes.
Conclusion
Drawing dimensions on a floor plan in AutoCAD is an essential skill for creating accurate and informative drawings. By understanding the types of dimensions, measurement units, and the process of creating and modifying dimensions, you can effectively convey the necessary information about the dimensions and relationships of elements within a space.

Making A Simple Floor Plan In Autocad Part 1 Of 3

How To Setup And Add Dimensions Floor Plans In Auto Cad

Autocad Floor Plan Tutorial For Beginners 6

Basic Floor Plan Drafting In Autocad 7 Steps Instructables

How To Draw Floor Plans In Autocad Edrawmax

Solved Draw The Floor Plan In Autocad As Shown Chegg Com

Autocad Drawing And Coohom Design 3d Fast Rendering Blog

Autocad Tutorial Draw A House Floor Plan Free Cad Blocks In Dwg File Format

How To Make House Floor Plan In Autocad Fantasticeng

Autocad 2d Bathroom Floor Plans Graphic Design Courses
Related Posts