How to Create a Room Floor Plan: A Comprehensive Guide
Creating a room floor plan is a fundamental step in interior design, architectural planning, and even basic home improvement projects. A floor plan provides a visual representation of a room's layout, including dimensions, furniture placement, and the location of doors and windows. Whether planning a renovation, rearranging furniture, or designing a new space from scratch, a well-executed floor plan is invaluable. This article outlines the process of creating a room floor plan, covering essential steps and considerations.
1. Gathering Measurements: The Foundation of an Accurate Floor Plan
The initial step in creating a room floor plan is to accurately measure the room. Precision is critical at this stage, as any inaccuracies will compound throughout the planning process. Equip yourself with the following tools:
Measuring Tape: A long measuring tape, preferably 25 feet or longer, is necessary for capturing the overall dimensions of the room. Measuring tapes with both imperial (inches and feet) and metric (centimeter and meter) markings offer flexibility.
Laser Distance Measurer (Optional): For larger rooms or more complex shapes, a laser distance measurer can significantly expedite the process and improve accuracy. These devices utilize laser technology to instantly measure distances with minimal error.
Paper and Pencil: While digital tools are available, a notebook and pencil are still essential for sketching the room's outline and recording measurements. Choose a paper size that allows for a clear, uncluttered drawing. Graph paper can be particularly useful, as it provides a grid for maintaining proportions.
Level (Optional): A small level can be helpful for ensuring that measurements are taken horizontally, especially when measuring wall heights or window placements.
Start by sketching a rough outline of the room on your paper. This doesn't need to be perfectly to scale, but it should accurately represent the room's shape. Include the positions of doors, windows, and any permanent fixtures, such as fireplaces, built-in shelving, or radiators.
Measure each wall segment individually. If a wall has any breaks or indentations, measure each section separately. Record these measurements directly on your sketch next to the corresponding wall.
Measure the width and height of all doors and windows. Also, measure the distance from the corners of the room to these openings and from the floor to the bottom of window sills. Note which way doors swing open.
Document the location and dimensions of any permanent fixtures. This includes the size and position of fireplaces, built-in bookshelves, radiators, and any other elements that cannot be easily moved.
Measure the height of the room from floor to ceiling in multiple locations. This will help identify any variations in ceiling height, which can be important for planning lighting and furniture placement.
Double-check all measurements to ensure accuracy. Small errors can have a significant impact on the final floor plan, so taking the time to verify each measurement is crucial.
2. Choosing a Floor Plan Creation Method: Manual vs. Digital
Once the room measurements are complete, the next step involves creating the actual floor plan. There are two primary methods for doing this: manual drafting and digital drawing.
Manual Drafting: This involves using traditional drafting tools such as rulers, protractors, and compasses to create the floor plan on paper. Manual drafting offers a tactile and hands-on approach, which some designers prefer.
Advantages of Manual Drafting:
- Cost-effective: Requires minimal investment in tools and software.
- Portable: Can be done anywhere, anytime, without the need for a computer or power supply.
- Tactile: Provides a direct connection to the drafting process, which can enhance creativity.
Disadvantages of Manual Drafting:
- Time-consuming: Requires significantly more time and effort compared to digital methods.
- Less precise: More prone to human error.
- Difficult to edit: Making changes or revisions can be cumbersome and time-consuming.
- Limited collaboration: Sharing and collaborating on manual floor plans can be challenging.
Digital Drawing: This involves using computer-aided design (CAD) software or other specialized floor plan creation tools to create the floor plan on a computer. Digital drawing offers numerous advantages over manual drafting.
Advantages of Digital Drawing:
- Highly accurate: Software tools provide precision and minimize the risk of errors.
- Easy to edit: Making changes or revisions is simple and quick.
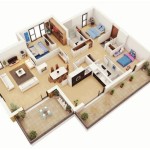
- Versatile: Allows for the creation of 2D and 3D floor plans.
- Collaborative: Facilitates easy sharing and collaboration with other designers and clients.
- Scalable: Can be easily scaled and printed at various sizes.
Disadvantages of Digital Drawing:
- Requires software and training: Requires an investment in software and time to learn how to use it effectively.
- Relies on technology: Requires a computer and power supply.
- Can be expensive: Professional-grade CAD software can be costly.
Numerous software options are available for creating digital floor plans, ranging from free online tools to professional-grade CAD software. Some popular options include:
SketchUp: A user-friendly 3D modeling program that is widely used for architectural design and interior planning.
AutoCAD: A professional-grade CAD software that is commonly used by architects and engineers for creating detailed technical drawings.
Floorplanner: An online floor plan creation tool that offers a range of features for creating 2D and 3D floor plans.
RoomSketcher: Another online floor plan creation tool that is designed for interior design and home improvement projects.
The choice between manual drafting and digital drawing depends on personal preference, budget, and the complexity of the project. For simple room layouts, manual drafting may be sufficient. However, for more complex projects or for those who require precise and editable floor plans, digital drawing is generally the preferred option.
3. Detailing the Floor Plan: Incorporating Essential Elements
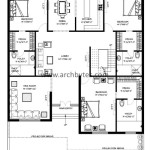
Once the basic floor plan is drawn, whether manually or digitally, the next step involves adding details to make it a complete and informative representation of the room. This includes incorporating symbols for doors, windows, furniture, and other essential elements.
Doors: Doors are typically represented by an arc indicating the direction of the door's swing. The arc should originate from the hinge side of the door and extend to the point where the door would rest when fully open. Ensure the door swing path does not interfere with other objects in the room.
Windows: Windows are typically represented by two or more parallel lines within the wall, indicating the glazing. The number of lines can represent the number of window panes. Include the dimensions of the window and its height from the floor.
Furniture: Furniture placement is a key aspect of a room floor plan. Use standard symbols to represent different types of furniture, such as sofas, chairs, tables, and beds. Ensure that the furniture is drawn to scale and that there is adequate space for movement and circulation around it. Consider the ergonomic aspects of furniture placement, such as the distance between seating areas and televisions.
Fixtures: Include any permanent fixtures, such as fireplaces, built-in shelving, radiators, and electrical outlets. Use appropriate symbols to represent these elements and indicate their dimensions and locations. Consider the placement of electrical outlets in relation to furniture and appliances.
Dimensions: Clearly label all dimensions on the floor plan, including the overall dimensions of the room, the dimensions of walls, doors, windows, and furniture. Use a consistent unit of measurement (e.g., feet and inches or meters) throughout the floor plan. Double-check all dimensions to ensure accuracy.
Scale: Indicate the scale of the floor plan. A common scale for room floor plans is 1/4 inch = 1 foot or 1:50 in metric. This indicates the ratio between the dimensions on the floor plan and the actual dimensions of the room. Using a consistent scale ensures that the floor plan is an accurate representation of the space.
Annotations: Add annotations to the floor plan to provide additional information or clarification. This may include notes about materials, colors, or special features. Annotations can be particularly helpful for communicating design ideas to clients or contractors.
By meticulously adding these details, the floor plan transforms from a simple outline into a comprehensive guide for space planning and design. The attention to detail at this stage will pay dividends in the long run, ensuring that the final design is both functional and aesthetically pleasing.
Creating a room floor plan is a multi-faceted process that requires careful measurement, thoughtful planning, and attention to detail. Regardless of whether one chooses to create one manually or digitally, the fundamental principles remain the same. With practice and patience, anyone can master the art of floor plan creation and use it to transform their living spaces.

An Easy Room Layout Planner Life On Virginia Street

The Make Room An Interactive Planner Articles Shaynna Blaze

How To Make Floor Plan Naksha Dekho

How To Make A Floor Plan For Interior Design Process

Draw A Room From The Floor Plan Medibang Paint Free Digital Painting And Manga Creation

Blender For Noobs 10 How To Create A Simple Floorplan In

Floorplanner For Personal Use Easy Home Design Free Room Planner

Make Your Own Blueprint How To Draw Floor Plans

How To Make A Room Feel Bigger

How To Make Floor Plan Naksha Dekho
Related Posts

