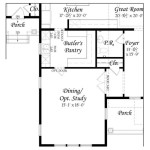
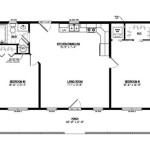
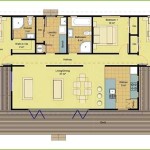
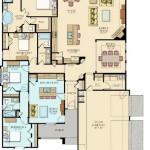
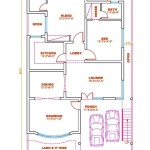
How to Draw a Bedroom Floor Plan
Drawing a bedroom floor plan is a fundamental skill for interior designers, architects, homeowners planning renovations, and even those simply rearranging furniture. A well-executed floor plan provides a visual representation of the room's dimensions, features, and potential layouts, facilitating effective space planning and communication. This article will outline the process of creating an accurate and informative bedroom floor plan, covering essential steps and considerations.
Gathering Measurements and Defining the Space
The initial stage of creating a bedroom floor plan involves accurately measuring the room and its features. This process is crucial for ensuring the plan reflects the true dimensions of the space. Accurate measurements are the foundation upon which all subsequent design decisions will be made.
Begin by measuring the overall length and width of the bedroom. Use a measuring tape or a laser distance measurer for greater accuracy, particularly in larger rooms. Record these measurements clearly and consistently. Measure from wall to wall, ensuring the tape is held straight and taut to avoid any inaccuracies. Note any irregularities in the wall shapes, such as alcoves or angled walls.
Next, measure the location and dimensions of all fixed features within the room. This includes doorways, windows, closets, built-in shelves, radiators, and any other structural elements. For doorways and windows, measure their width, height, and their distance from the adjacent walls. Similarly, measure the dimensions of closets, including their depth and width. Record the location of electrical outlets, light switches, and any other utilities within the room. These elements are vital for planning furniture placement and electrical system layouts.
It is highly recommended to create a rough sketch of the room while taking measurements. This sketch serves as a visual aid, allowing you to mark the location of each measurement and feature. As you measure each element, immediately record the corresponding dimension on the sketch. This practice helps prevent confusion and ensures all necessary measurements are captured. Label each measurement clearly on the sketch to avoid misinterpretation later. For example, label the wall length as "Wall A," the window width as "Window 1 Width," and so on.
Pay close attention to the thickness of walls. While often overlooked, wall thickness can impact interior space, especially when considering built-in elements or tight clearances. Measure the thickness of each wall to account for its presence in the floor plan. This measurement is particularly important for exterior walls, which may be thicker than interior walls due to insulation.
Finally, note the ceiling height. While not directly represented on a standard floor plan, the ceiling height influences the overall perception of space and is crucial for selecting appropriately sized furniture and fixtures. A low ceiling may restrict the use of tall furniture or hanging light fixtures. This measurement should be recorded alongside the other dimensions of the room.
Choosing a Drawing Method and Scale
Once the measurements are complete, the next step involves selecting a drawing method and scale for the floor plan. The choice of method depends on the level of detail required, the intended use of the plan, and the user's technical skills.
Manual drawing, using graph paper, a ruler, and pencils, is a traditional method that offers a hands-on approach. Graph paper provides a pre-defined grid, making it easier to maintain accurate proportions and scale. This method is suitable for simple floor plans or for those who prefer a tactile drawing experience. To begin, choose a scale that is appropriate for the size of the room and the paper. Common scales include 1/4 inch = 1 foot or 1/2 inch = 1 foot. This means that every 1/4 inch or 1/2 inch on the paper represents one foot in the actual room. Translate the measurements into the chosen scale and accurately draw the walls, doors, windows, and other features onto the graph paper. Ensure all lines are straight and accurately represent the dimensions.
Computer-Aided Design (CAD) software offers a more precise and versatile approach to creating floor plans. CAD programs allow users to draw to exact dimensions, easily edit and modify elements, and create detailed and professional-looking plans. Popular CAD software options include AutoCAD, SketchUp, and Revit. These programs typically offer a wide range of tools for drawing walls, doors, windows, and other architectural features. Users can specify precise dimensions and angles, ensuring accuracy. CAD software also allows for layering, which enables the user to organize different elements of the plan (e.g., walls, furniture, electrical) onto separate layers for easy editing and visibility control. While CAD software requires a learning curve, it provides significant advantages in terms of precision, flexibility, and professional presentation.
Online floor plan tools provide a user-friendly alternative to CAD software, offering a simplified interface and pre-designed templates. These tools are often web-based and require no software installation. Popular online floor plan tools include RoomSketcher, SmartDraw, and Floorplanner. These tools typically offer drag-and-drop functionality, allowing users to easily add walls, doors, windows, and furniture to the plan. While online tools may not offer the same level of customization as CAD software, they are a convenient option for creating basic floor plans quickly and easily. Most online tools offer a free trial or a limited free version, allowing users to test the software before committing to a subscription.
Regardless of the chosen method, maintaining a consistent scale is critical for accuracy. Ensure all measurements are translated correctly into the chosen scale and that the drawings are proportionate. Double-check all dimensions and angles to minimize errors. A floor plan that is drawn accurately to scale allows for easy visualization of the space and ensures that furniture and other elements will fit correctly within the room.
Representing Architectural Features and Adding Details
Once the basic floor plan, which includes the walls and overall dimensions, is established, the next step involves adding architectural features and other relevant details. This includes accurately representing doors, windows, closets, and built-in elements, as well as indicating electrical outlets, light switches, and other utilities.
Doors are typically represented by an arc that indicates the swing direction. The arc should originate from the hinge side of the door and extend to the door's resting point. The size of the arc should correspond to the width of the door. Indicate whether the door swings inward or outward. It is also helpful to note the door's width and any special features, such as a double door or sliding door.
Windows are usually depicted as a pair of parallel lines within the wall, representing the window frame. The lines should extend across the width of the window opening. Indicate the type of window (e.g., casement, sliding, double-hung) with appropriate symbols or notations. Note the window's width, height, and its sill height from the floor. Different types of windows are represented differently in floor plans. For instance, a bay window would be shown as protruding from the main wall.
Closets are represented by a rectangular shape within the room. Indicate whether the closet has a swinging door, sliding doors, or no door. If the closet has shelving or hanging rods, these can be indicated with dashed lines or specific symbols. Accurate representation of closet space is vital for planning storage solutions.
Electrical outlets are typically represented by a circle with two short lines extending from it. Light switches are represented by a circle with a line extending from it. Indicate the location of all electrical outlets, light switches, and other electrical fixtures, such as ceiling fans or recessed lighting. This information is crucial for planning the electrical layout and ensuring adequate power supply throughout the room.
Other architectural details, such as fireplaces, built-in shelves, or radiators, should be represented accurately in the floor plan. Use appropriate symbols or notations to indicate their presence and dimensions. For example, a fireplace can be represented by a rectangular shape with a chimney symbol. Details like radiators are important when planning furniture placement, as they may obstruct certain areas.
Add furniture templates or drawings to show the intended furniture arrangement in the room. This helps visualize the space and ensure furniture fits comfortably. Use standardized symbols for common furniture pieces, such as beds, dressers, and desks. Indicate the dimensions of each furniture piece to ensure accuracy. Furniture arrangement demonstrates how the room will be used and can guide the placement of electrical outlets and lighting fixtures.
Finally, dimension lines should be added. These are lines that illustrate the measurements of various parts of the room. They normally extend from the object being measured with a numerical indication of the distance. These make the floor plan easily understandable and are important for construction and design purposes.

Floor Plans Learn How To Design And Plan

How To Draw A Floor Plan As Beginner Edrawmax

Draw A Room From The Floor Plan Medibang Paint Free Digital Painting And Manga Creation

How To Draw A Floor Plan Like Pro The Ultimate Guide Interior Editor

How To Draw A Floor Plan Dummies

Ready To Use Sample Floor Plan Drawings Templates Easy Blue Print Floorplan Ezblueprint Com

How To Draw A Bedroom Floor Plan

How To Draw A Floor Plan The Simple 7 Step Guide For 2024

Draw Floor Plans With The Roomsketcher App

9 Tips To Consider When Planning Your Bedroom Layout
Related Posts