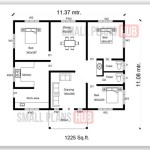
Drawing a Floor Plan Blueprint of Your Home
Creating a floor plan blueprint of a home is a fundamental step in various activities, ranging from home improvement projects and interior design planning to real estate valuation and emergency preparedness. A detailed and accurate floor plan serves as a visual representation of the layout, dimensions, and features of a property, providing a basis for communication and decision-making amongst homeowners, contractors, designers, and other stakeholders. The process of drawing a floor plan can be accomplished using various methods, each with its own advantages and limitations. This article will explore the essential steps and considerations involved in drawing a floor plan blueprint of your home.
Floor plans are not merely architectural drawings; they are essential tools for optimizing space, visualizing changes, and ensuring accurate execution of projects. For homeowners, a clear floor plan blueprint can be invaluable when planning renovations, rearranging furniture, or even simply understanding the spatial relationships within their home. For professionals, such as architects and contractors, floor plans are the foundation upon which designs are built and construction is managed. Therefore, understanding how to accurately depict a home’s floor plan is a crucial skill regardless of profession or project scale.
Several factors influence the accuracy and effectiveness of a floor plan. These include the precision of measurements, the clarity of symbols and annotations, and the appropriate selection of drawing tools and techniques. Attention to detail is paramount, as even minor inaccuracies can lead to significant errors in subsequent planning or construction stages. Furthermore, understanding building codes and regulations related to floor plan requirements can ensure compliance and prevent potential issues down the line.
Key Point 1: Gathering Necessary Tools and Materials
The initial step in creating a floor plan blueprint involves assembling the necessary tools and materials. The selection of these tools will largely depend on the chosen method – whether manual drafting or digital design. Though digital methods offer greater flexibility and precision, manual drafting remains a viable option for smaller, less complex floor plans.
For manual drafting, the following tools are essential: a measuring tape (preferably a long one, at least 25 feet), graph paper (with a suitable grid size to accommodate the dimensions of the home), a pencil (preferably a mechanical pencil for consistent line thickness), an eraser, a ruler or straightedge, and a protractor (for accurately depicting angles). A clipboard can also be helpful for providing a stable surface to work on.
When creating a floor plan digitally, a computer or tablet with appropriate software is required. Various computer-aided design (CAD) programs and floor planning applications are available, ranging from free, web-based options to professional-grade software. Popular CAD programs include AutoCAD, SketchUp, and Revit. Floor planning applications like SmartDraw, RoomSketcher, and Planner 5D are specifically designed for creating floor plans and often offer user-friendly interfaces and pre-designed templates. A laser measuring device can also be very helpful when creating a floor plan digitally since it can significantly reduce the time spent measuring and provide more accurate results.
Regardless of the chosen method, accurate measurements are crucial. The measuring tape should be of sufficient length to measure the longest dimensions of the rooms without requiring multiple measurements. When using a CAD program, it should be ensured that the software has the appropriate units of measurement set (e.g., feet, inches, meters) to avoid conversion errors. The level of detail to be included in the floor plan should also be considered. For example, if the floor plan will be used for interior design purposes, it may be necessary to include the location of electrical outlets, light switches, and other fixtures.
Key Point 2: Measuring and Sketching the Existing Space
Once the tools and materials are prepared, the next step is to measure and sketch the existing space. This process involves carefully measuring the dimensions of each room, as well as the locations of walls, doors, windows, and other fixed features. Consistency and accuracy are paramount in this stage, as any errors will be reflected in the final floor plan.
The process should begin by creating a rough sketch of the home’s overall layout. This sketch does not need to be precise, but it should accurately represent the relative positions of the rooms and hallways. It's recommended to start with the exterior walls and then work inward, measuring and adding interior walls, doors, and windows. It is important to keep the sketch proportionate. This will help with the final floor plan.
When measuring, it's advisable to work systematically, starting in one corner of the room and measuring along each wall. Record all measurements in a notebook or directly into the digital floor plan program. Pay particular attention to the thickness of the walls, as this can affect the overall dimensions of the rooms. For doors and windows, measure the width, height, and distance from the nearest wall or corner. Note the direction in which doors swing open. Also note the location of any architectural features such as fireplaces, built-in cabinets or shelving.
It is important to measure the room more than once. Discrepancies in measurements should be investigated and corrected immediately. If the room is not perfectly square (which is common in older homes), take multiple measurements along each wall and use the average value. For angled walls, use a protractor to measure the angle and record it on the sketch. When measuring, be sure to account for any obstructions, such as furniture or appliances. If possible, move these obstructions out of the way to ensure accurate measurements. If obstructions cannot be moved, estimate their size and location as accurately as possible.
Key Point 3: Transferring Measurements to a Scaled Drawing
The final stage involves transferring the measurements from the sketches into a scaled drawing. This can be done either manually on graph paper or digitally using CAD software or a floor planning application. The objective is to create an accurate and proportionate representation of the home’s floor plan.
When drawing manually, choose a suitable scale that will allow the entire floor plan to fit onto the graph paper. A common scale is 1/4 inch = 1 foot, meaning that every 1/4 inch on the graph paper represents 1 foot in the actual room. Using the chosen scale, convert all measurements to the corresponding dimensions on the graph paper. For example, if a wall is 12 feet long and the scale is 1/4 inch = 1 foot, the wall should be drawn 3 inches long on the graph paper (12 feet x 1/4 inch/foot = 3 inches). Use a ruler or straightedge to draw the walls, doors, and windows to scale, ensuring that they are accurately positioned according to the measurements. It is important to use consistent line thicknesses and clear symbols to represent different features.
When drawing digitally, the process is similar, but the program handles the scaling automatically. Set the appropriate units of measurement (e.g., feet, inches, meters) and the desired scale. Input the measurements directly into the program, and it will automatically draw the walls, doors, and windows to scale. Most CAD programs and floor planning applications offer pre-designed symbols for doors, windows, stairs, and other features, which can be easily inserted into the floor plan. These programs also offer tools for adding annotations, such as room names, dimensions, and notes. Digital floor plans are easily editable and can be saved and shared electronically.
Regardless of the method used, verify that the floor plan is accurate and proportionate. Double-check all measurements and ensure that the walls are straight and the angles are correct. Use a checklist to ensure that all features have been included, such as doors, windows, stairs, fireplaces, and electrical outlets. The final floor plan should be clear, legible, and easy to understand. It should provide an accurate representation of the home’s layout and dimensions.
In conclusion, drawing a floor plan blueprint of a home is a valuable skill that can be applied in various contexts. By following the steps outlined in this article, homeowners and professionals can create accurate and detailed floor plans that serve as a basis for planning, design, and construction. The selection of tools and methods will depend on the complexity of the home and the specific needs of the project. Regardless of the approach, attention to detail and accuracy are essential for creating a functional and effective floor plan. A well-executed floor plan blueprint will be instrumental in bringing design concepts to life and achieving desired outcomes.

Create And Visualize House Plans In Minutes Roomsketcher

Make Your Own Blueprint How To Draw Floor Plans

How To Draw Blueprints For A House With Pictures Wikihow

How To Draw Blueprints For A House With Pictures Wikihow

Make Your Own Blueprint How To Draw Floor Plans

Blueprint Maker Free App

Upload Draw From Or Trace Over A Blueprint Roomsketcher

How To Find Floor Plans For A House Monster

How To Draw A Floor Plan Live Home 3d

How To Read New Floor Plans Essential Tips Lancia Homes Fort Wayne In
Related Posts

