How to Draw a Floor Plan of Your House Using Free Apps
Creating a floor plan of a house can be a valuable asset for various purposes, including renovation projects, interior design, space planning, and even real estate listings. Traditionally, professional architects or draftsmen were required to generate these plans, often incurring significant costs. However, the advent of user-friendly technology has provided individuals with the ability to create their own floor plans using free applications. These applications offer a range of tools and features that simplify the process, making it accessible to individuals with varying levels of technical expertise. This article outlines how to effectively use free applications to draw a floor plan of your house, detailing crucial steps and considerations for achieving accurate and useful results.
Before embarking on the floor plan creation process, it's vital to understand the scope and purpose of the plan. Are you looking for a basic layout for furniture arrangement, or a detailed plan for structural modifications? The level of detail required will influence the choice of application and the time investment necessary. Furthermore, gathering accurate measurements is paramount. Use a laser distance measurer for optimal precision, as tape measures can be prone to errors, especially over longer distances. Ensure all walls, doorways, windows, and permanent fixtures are measured and documented accurately.
Key Point 1: Selecting the Right Free Floor Plan App
The market offers a plethora of free floor plan applications, each with its own strengths and limitations. Selecting the most suitable application depends on individual needs and preferences. Some applications are geared towards simplicity and ease of use, while others offer more advanced features and customization options. Here’s a look at some popular categories and examples:
Web-Based Applications: These applications run directly in a web browser, eliminating the need for software installation. They are often compatible with various operating systems, including Windows, macOS, and Linux. Examples include:
Floorplanner: This web-based tool allows users to create 2D and 3D floor plans and includes a library of furniture and décor items. The free version offers limited features, but it can be sufficient for basic floor plan creation.
RoomSketcher Free: Similar to Floorplanner, RoomSketcher Free allows users to create floor plans and visualize them in 3D. It also includes basic furniture and material libraries. The free version has limitations on the number of projects and features.
Mobile Applications: These applications are designed for use on smartphones and tablets, offering convenience and portability. They often leverage the device's camera and sensors to aid in measurement and floor plan creation. Examples include:
Magicplan: This application uses the device's camera to scan rooms and generate a basic floor plan. It's known for its ease of use, although accuracy can vary depending on the device and scanning conditions. The free version has limitations on the number of plans that can be created.
Floor Plan Creator: Available on Android, this application allows users to draw floor plans using a drag-and-drop interface. It supports both 2D and 3D views and offers a range of customization options. The free version may contain ads and have limitations on certain features.
Software Applications (Limited Free Versions): Some professional-grade software packages offer limited free versions or trial periods. These versions often provide more advanced features than web-based or mobile applications. Examples include:
SketchUp Free: While primarily a 3D modeling program, SketchUp Free can also be used to create 2D floor plans. It offers a range of drawing tools and customization options. However, it requires a steeper learning curve than simpler applications.
Before committing to an application, it's advisable to try out several different options to determine which one best suits your needs and skill level. Consider factors such as ease of use, feature set, compatibility with your devices, and the ability to export the floor plan in a usable format (e.g., PDF, JPG).
Once the application is chosen, familiarize yourself with its interface and tools. Most applications offer tutorials or help documentation that can guide you through the process.
Key Point 2: Drawing the Walls and Basic Structure
The foundation of any floor plan is the accurate representation of the walls and structural elements of the house. This step involves translating the gathered measurements into the application's drawing environment.
Setting the Scale: Many applications require you to set the scale of the drawing before you begin. This ensures that the dimensions of the floor plan are accurate. Typically, you'll be prompted to enter a known measurement, such as the length of a wall, and the application will automatically adjust the scale accordingly. Double-check the scale frequently throughout the process to avoid cumulative errors.
Drawing the Exterior Walls: Begin by drawing the exterior walls of the house. Use the application's line drawing tool to create the walls, ensuring that the lines are straight and connected. Pay close attention to the measurements of each wall and enter them accurately into the application. Most applications allow you to enter measurements directly as you draw, either by typing them in or by dragging the line to the desired length.
Adding Interior Walls: Once the exterior walls are in place, add the interior walls to define the individual rooms. Use the same line drawing tool to create the interior walls, ensuring that they are connected to the exterior walls or other interior walls. Pay attention to the thickness of the walls, as this can affect the overall dimensions of the rooms. Most applications allow you to specify the wall thickness.
Inserting Doors and Windows: After the walls are drawn, add doors and windows to the floor plan. Most applications offer pre-designed door and window symbols that you can drag and drop into the drawing. Position the doors and windows accurately based on your measurements. Make sure to specify the width of the doors and windows, as well as their swing direction (for doors). The placement of doors and windows significantly impacts the functionality and aesthetics of the floor plan.
Accounting for Structural Elements: In addition to walls, doors, and windows, the floor plan should also include any other significant structural elements, such as columns, beams, or staircases. These elements can affect the flow of the space and should be accurately represented in the drawing. Most applications offer symbols for common structural elements.
Throughout this process, it's crucial to double-check your measurements and the accuracy of the drawing. Use the application's measurement tools to verify the dimensions of walls, rooms, and other elements. Correct any errors as soon as they are detected to avoid compounding them later on.
Key Point 3: Adding Details and Annotations
Once the basic structure of the floor plan is complete, it's time to add details and annotations to enhance its clarity and usefulness. These details can include furniture, appliances, fixtures, and labels.
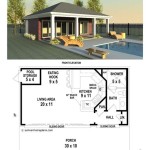
Adding Furniture and Appliances: Most floor plan applications offer libraries of furniture and appliance symbols that you can drag and drop into the drawing. These symbols can help you visualize how furniture will fit into the space and how the rooms will function. Choose furniture symbols that are similar in size and style to your actual furniture. Pay attention to the scale of the furniture symbols to ensure that they are proportional to the rest of the floor plan.
Adding Fixtures and Fittings: In addition to furniture and appliances, you can also add symbols for fixtures and fittings, such as sinks, toilets, showers, and light fixtures. These symbols can help you plan the layout of bathrooms and kitchens. Position the fixtures and fittings accurately based on their actual locations.
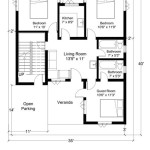
Adding Labels and Annotations: Labels and annotations are essential for clarifying the purpose of each room and providing additional information about the floor plan. Label each room with its name (e.g., "Living Room," "Bedroom," "Kitchen"). You can also add annotations to indicate the dimensions of rooms, the location of outlets, or other relevant details. Use clear and concise language in your labels and annotations.
Adding Dimensions: Showing dimensions is crucial for anyone using the floor plan for construction, renovation, or even furniture arrangement. Most applications have dimensioning tools to accurately measure and display wall lengths, room sizes, and other important distances. Ensure dimensions are clear, legible, and use a consistent unit of measurement (e.g., feet and inches, meters).
Choosing Colors and Styles: While not essential for all floor plans, adding colors and styles can improve their visual appeal and clarity. Use different colors to distinguish between different rooms or areas. You can also use different line weights to emphasize certain features, such as exterior walls. Be mindful of color choices and line weights and ensure they enhance, rather than detract from, the floor plan's readability.
Exporting the Floor Plan: Once the floor plan is complete, you'll need to export it in a usable format. Most applications offer a variety of export options, such as PDF, JPG, PNG, and SVG. Choose the format that best suits your needs. PDF is a good option for printing and sharing, while JPG and PNG are suitable for web use. Check the quality of the exported floor plan to ensure that it is clear and legible.
By following these steps, you can effectively use free applications to draw a floor plan of your house. Remember that accuracy and attention to detail are paramount to creating a useful and informative floor plan. Take your time, double-check your work, and don't hesitate to experiment with different features and tools to find the best approach for your particular needs. Regularly save your work to prevent data loss. While free applications provide a cost-effective solution, understanding their limitations and prioritizing careful measurement will lead to a valuable and accurate representation of your home's layout.

Beginners Guide To Drawing A Floor Plan With Free

Blueprint Maker Free App

How To Make Floor Plans For Free In Sketchup

Free Floor Plan Creator Design 2d 3d Layouts Easily

How To Draw Floor Plans Guide Create In 2d And 3d

Floor Plan Design 2d 3d Layouts With Ease

How To Draw A Floor Plan Live Home 3d

How To Draw Floor Plans Guide Create In 2d And 3d

Best House Design App Top 10 Options For 2025 Cedreo

Free Floor Plan Creator Edrawmax
Related Posts

