How to Create a Floor Plan in Blender 3D
Blender 3D is a versatile free and open-source software that offers a wide range of tools for creating 3D models, animations, and even architectural visualizations. Creating a floor plan in Blender can be a simple and efficient process, allowing you to design and visualize your space with precision. This guide will walk you through the fundamental steps of creating a floor plan in Blender, providing you with a clear understanding of the workflow and key functionalities.
1. Setting Up the Scene
Before you begin modeling, it's important to prepare your scene in Blender. This ensures a clean and organized environment, enabling you to focus on the floor plan itself. Here's how to set up your scene:
- Create a New Scene: Start by opening Blender and creating a new scene. This will provide you with a blank canvas to work on.
- Set the Units: Navigate to the "Scene Properties" panel (accessed through the "Properties" window, "Scene" tab) and select the appropriate units for your floor plan. Choose "Metric" if you're working with meters or "Imperial" if you're using feet and inches.
- Enable Grid and Snap: Activate the grid from the "View" tab in the "Properties" window. This will provide visual guidance during your modeling process. In the "Snap" settings, enable "Vertex" and "Edge." This will help you precisely position and align objects.
- Adjust Camera View: Use the "Camera" tool (found in the "View" menu or by pressing "0" on the numpad) to adjust the camera's perspective. This is crucial for visualizing your floor plan in 2D.
2. Modeling the Floor Plan
The next step involves creating the basic structure of your floor plan using various modeling tools in Blender. This section will cover the most common techniques for achieving this goal.
- Using the Plane Primitive: The most straightforward approach is to use the "Plane" primitive. Add a new plane by pressing "Shift + A," selecting "Mesh," and then choosing "Plane." You can adjust the size of the plane in the "Properties" panel under "Object Data Properties." Use the "Scale" tool (found in the "Transform" menu or by pressing "S") to resize the plane to match your desired floor space.
- Extrude and Shape: For more complex shapes, utilize the "Extrude" tool. Select an edge or face of the plane, press "E" to extrude, and move the mouse to create the desired shape. The "Extrude" tool allows you to build walls, doorways, and other architectural elements.
- Loop Cuts: For creating detailed elements like rooms and internal walls, use "Loop Cuts" (found in the "Mesh" menu or by pressing "Ctrl + R"). Loop cuts allow you to add new edges and faces to your existing geometry, providing more control over the shape and complexity of your floor plan.
3. Adding Furniture and Other Elements
Once you have a solid floor plan, you can enrich its visual representation by adding furniture, appliances, and other objects. Here are several techniques to incorporate these elements into your scene.
- Import 3D Models: Blender's "Import" functionality allows you to integrate 3D models from external sources. These models can be found online or created using other modeling tools. You can import models in formats like OBJ, FBX, or GLTF. Position and scale imported models using the "Transform" menu (accessed by pressing "G," "S," or "R").
- Creating Furniture: Blender's intuitive modeling tools enable you to create custom furniture if necessary. Utilize the "Cube" primitive, "Extrude" tool, and "Loop Cuts" to construct furniture pieces. The "Bevel" tool (found in the "Mesh" menu) can be used to add rounded edges and create smoother shapes.
- Using Materials and Textures: Apply materials and textures to your furniture and other elements to achieve a realistic appearance. Materials define the color, reflectivity, and other properties of objects. Textures are images used to create surface details like wood grain, marble patterns, or fabric weaves. You can find pre-made materials and textures online or create your own.
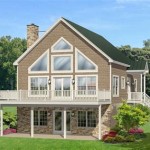
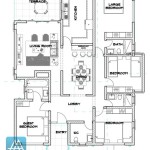
Creating a floor plan in Blender allows you to visualize your space in 3D, enabling you to understand the layout, dimensions, and overall feel of your design. This powerful tool opens up possibilities for architects, interior designers, and anyone interested in creating detailed and informative floor plans.

How To Make 3d Floor Plan In Blender Best Method Modeling

Blender For Noobs 10 How To Create A Simple Floorplan In

How To Make 3d Floor Plan In Blender

How To Make 3d Floor Plan In Blender Beginners Guide Part 1

Sketching A Floor Plan In Blender 3d Architect

How To Create A 3d Floor Plan In Blender 3 0

Create A 3d Floor Plan Model From An Architectural Schematic In Blender Blendernation

Sketching A Floor Plan In Blender 3d Architect

How To Make 3d Floor Plan In Blender Best Method Modeling

Rendering A Floor Plan With Blender 2 8 And Eevee 3d Architect
Related Posts