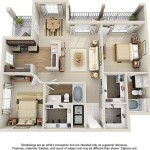
How to Create a Floor Plan in AutoCAD 2024
AutoCAD 2024 is a powerful software that allows you to create precise and detailed floor plans. Whether you are an architect, interior designer, or homeowner, learning how to make a floor plan in AutoCAD 2024 can be a valuable skill.
Step 1: Start a New Drawing
Open AutoCAD 2024 and start a new drawing. You can do this by clicking on the "File" tab and selecting "New." In the "New Drawing" dialog box, select the "Architectural" template and click "OK."
Step 2: Set Up Units and Grid
Before you start drawing, it is important to set up the units and grid. To do this, click on the "Format" tab and select "Units." In the "Units" dialog box, select the desired units (e.g., feet, inches, meters) and click "OK."
Next, click on the "View" tab and select "Grid." In the "Grid" dialog box, set the grid spacing and offset as desired. The grid will help you to keep your drawing organized and accurate.
Step 3: Draw the Walls
To draw the walls, click on the "Draw" tab and select the "Line" tool. Click on the starting point of the wall and drag the cursor to the endpoint. Repeat this process for all of the walls in the floor plan.
To create a closed wall, click on the "Close" tool in the "Draw" tab. This will automatically connect the last endpoint to the starting point.
Step 4: Add Doors and Windows
To add doors and windows, click on the "Insert" tab and select the "Block" tool. In the "Insert Block" dialog box, browse to the desired block (e.g., door, window) and click "OK."
Click on the insertion point for the block and drag the cursor to the desired size. Repeat this process for all of the doors and windows in the floor plan.
Step 5: Add Dimensions
Adding dimensions to the floor plan helps to ensure accuracy and clarity. To add a dimension, click on the "Annotate" tab and select the "Linear Dimension" tool.
Click on the first point of the dimension, drag the cursor to the second point, and release the mouse button. The dimension will be automatically generated.
Step 6: Add Furniture and Fixtures
To add furniture and fixtures to the floor plan, click on the "Insert" tab and select the "Block" tool. In the "Insert Block" dialog box, browse to the desired block (e.g., chair, table, bed) and click "OK."
Click on the insertion point for the block and drag the cursor to the desired size. Repeat this process for all of the furniture and fixtures in the floor plan.
Step 7: Save and Export
Once you have completed the floor plan, click on the "File" tab and select "Save." In the "Save As" dialog box, enter a file name and select a save location. Click "Save" to save the drawing.
If you need to share the floor plan with someone who does not have AutoCAD, you can export the drawing to a different file format. Click on the "File" tab and select "Export." In the "Export" dialog box, select the desired file format (e.g., PDF, DWG, JPG) and click "OK."
Conclusion
Creating a floor plan in AutoCAD 2024 is a relatively simple process that can be mastered with a little practice. By following these steps, you can create accurate and detailed floor plans that can be used for a variety of purposes.

Autocad 2024 Tutorial Making A Simple Floor Plan In 2d Drawing

Autocad 2024 Basic 2d Floor Plan For Beginner Complete

Autocad 2024 Basic 2d Floor Plan For Beginner Complete
Autocad 2024 Help Views With Names Autodesk

Autocad 2024 Tutorial Making A Simple Floor Plan In 2d Drawing

Autocad 2024 Help File Tab Menu Autodesk

Autocad 2024 Basic 2d Floor Plan For Beginner Complete

Basic Floor Plan Drafting In Autocad 7 Steps Instructables

Autocad 2024 Help What S New In Architecture Toolset Autodesk

Autocad 2024 Tutorial Making A Simple Floor Plan In 2d Drawing
Related Posts

