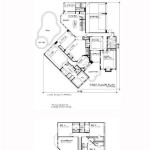
How to Draw a Plot Plan in AutoCAD
A plot plan is a scaled drawing that shows the layout of a property, including buildings, driveways, walkways, trees, and other features. It is an essential document for planning and designing any construction or landscaping project. AutoCAD is a popular software program for creating plot plans, and it offers a variety of tools and features that make the process easy and efficient.
Getting Started
Before you begin drawing a plot plan in AutoCAD, you will need to gather some information about the property. This includes the property dimensions, the location of the buildings and other features, and the topography of the land. You can collect this information from a survey or from the county assessor's office.
Creating a New Drawing
Once you have gathered the necessary information, you can create a new drawing in AutoCAD. To do this, click on the "File" menu and select "New." In the "New Drawing" dialog box, select the "Architectural" template. This template will provide you with a starting point for your plot plan.
Setting Up the Drawing Units
The next step is to set up the drawing units. The units you choose will depend on the scale of your plot plan. For most residential plot plans, it is common to use feet and inches. To set the drawing units, click on the "Format" menu and select "Units."
Drawing the Property Lines
The first step in drawing a plot plan is to draw the property lines. To do this, use the "Line" tool. Click on the "Line" tool in the "Draw" panel, and then click on the starting point of the property line. Move the cursor to the end point of the property line, and then click again to place the line. Repeat this process for all of the property lines.
Adding Buildings and Other Features
Once you have drawn the property lines, you can start adding buildings and other features to the plot plan. To do this, use the "Insert" menu. Click on the "Insert" menu, and then select "Block." In the "Insert Block" dialog box, select the block that you want to insert. Move the cursor to the location where you want to insert the block, and then click to place it.
Adding Dimensions
Dimensions are an important part of any plot plan. They show the distances between different features on the property. To add dimensions to your plot plan, use the "Dimension" tool. Click on the "Dimension" tool in the "Annotate" panel, and then select the type of dimension that you want to add. Move the cursor to the start point of the dimension, and then click. Move the cursor to the end point of the dimension, and then click again to place the dimension.
Printing the Plot Plan
Once you have finished drawing your plot plan, you can print it. To do this, click on the "File" menu and select "Print." In the "Print" dialog box, select the printer that you want to use. Click on the "OK" button to print the plot plan.
Conclusion
Drawing a plot plan in AutoCAD is a relatively easy process. By following the steps outlined in this article, you can create a plot plan that is accurate and easy to read. Plot plans are an essential document for planning and designing any construction or landscaping project, and they can be a valuable asset to any property owner.

How To Create A Site Plan Using Autocad

Autocad Tutorial Site Layout Exercise 1 Cadtutor

How To Create A Site Plan Using Autocad

How To Draw A Site Plan

Drawing A Plot Plan In Degrees And Minutes Autocad Lines

Draw Site Plan Landscape Colony Drawings In Autocad By Macpk35 Fiverr

How To Create A Site Plan Using Autocad

Creating Autocad Plot Stamps With Fields Td Synnex Public Sector

Layouts And Plotting In Autocad Tutorial S

Draw Site Plan Plot Drawings For City Permit In Autocad By Saira35 Fiverr
Related Posts


